This guide shows you:
- What a matte box is,
- Why a matte box is what it is,
- The different types of matte boxes,
- What to look for in a good matte box, and
- Some options.

What is a Matte Box?
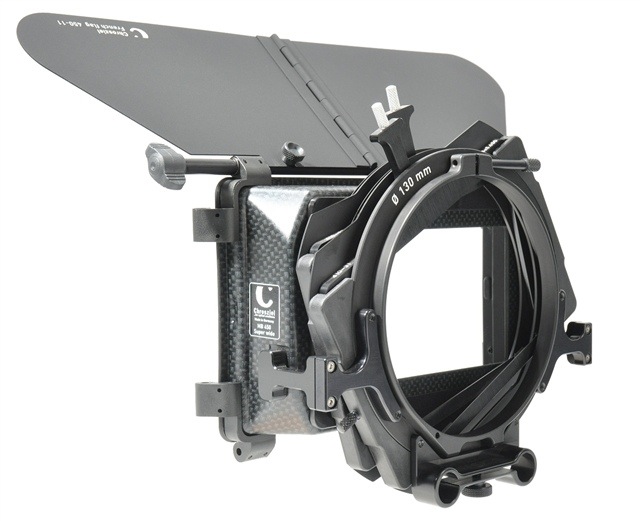
This is what a matte box looks like:

It all starts with a rectangular frame (called a matte) that you attach at the front of your lens. They’re like cut-outs, and look like this:

Why would anyone want to attach a frame to the front of the lens?
A matte blocks out stray light from hitting the sensor. This is a common problem when there are multiple light fixtures on set. You’re always dealing with light leaks and reflections.
The mattes need to be held in place, so it is enclosed in a casing, a box, sometimes called a sunshade:

And this is the view from the back:

You’ll notice three things:
- First, the sunshade box itself is also a kind of matte. If the shape of this matte isn’t enough, and you need to add another, smaller matte, you can with some models like the Arri MMB-2. The Bright Tangerine Misfit Atom doesn’t offer this feature.
- It has an opening at the back (typically circular) to accommodate the front of a lens.
- There’s a tray in the Bright Tangerine matte box, and two tray slots in the Arri MMB-2 matte box. Some matte boxes can have three or even four trays.
The tray can hold filters, like ND filters, etc. We’ll look at these things in a bit.
Fundamentally, the reason a matte box exists is for two reasons:
- It cuts lens flare
- It mounts filters in front of the lens
To know more about filters, read The Complete Lens Filter Guide:
Even if the functions of the matte box are minimal, matte boxes can get complicated to the newcomer.
Think about this: There are many ways to cut lens flares, or many ways in which you might want to use filters, and so on. As a general rule, the more expensive the matte box, the more features it has to accommodate a wide range of scenarios you might encounter on set.
For example, the Bright Tangerine Misfit Atom will do the job it was designed to do, but it doesn’t have additional mattes, or a second filter tray like the Arri MMB-2. As you can see, the price difference reflects that.
How do you know if you need these features?
Let’s start by identifying the various parts of a matte box, and things will get a bit clearer. First of all, every matte box will have the matte box and a hole in the back. Otherwise it’s not a matte box.
Let’s start with the hole in the back.
The hole could be of any diameter, but typically in cinema work, you’ll find these three sizes:
- 143mm
- 114mm
- 95mm
You could have bigger or smaller sizes, but currently with digital systems these are the standards. The front diameter of your lens must be equal to or smaller than this number, or it won’t fit.
And, there are two ways to make lenses fit. These are:
- Lens-mounted matte boxes
- Rod-mounted matte boxes
Let’s look at each.
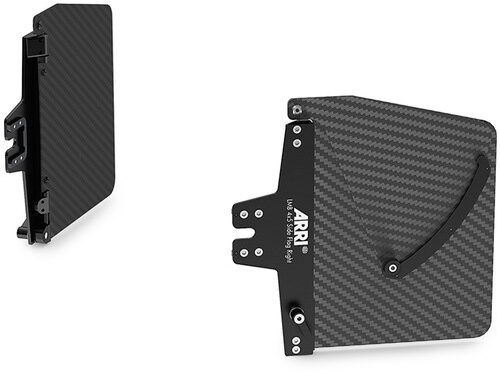
Lens-mounted Matte Boxes, or Clamp-on Matte Boxes
In lens-mounted matte boxes, popularly known as clamp-on matte boxes, the matte box (and everything on it) is supported completely by the lens. Needless to say, the matte box must be light enough to not stress the lens or the lens mount.
Here are the front and back views of such a matte box:

You can see quite clearly the lens, and by extension, the lens mount, must take all the weight.
One advantage of clamp-on matte boxes are they are typically lightweight. This benefits run-and-gun style filmmaking. It also keeps the overall weight of your camera system as light as it can be.
The disadvantages of lens-mounted matte boxes are that if you want to change a lens, you’ll have to remove the matte box. And, all your lenses must roughly have the same front diameter, or the matte box won’t attach correctly.
To avoid this second problem, some kits come with adapter rings for various lens diameters.
If the lens extends while zooming in or out, that might throw the orientation of the matte box off-kilter. However, with a cinema zoom lens that’s not bound to happen.
When would you look for clamp-on matte boxes?
- If you don’t need or want the matte box to be heavy.
- If the lens and mount can take the stress and weight. This is no small matter. Photography cameras don’t have strong lens mounts like you find in cinema cameras.
- If you typically don’t need to use many filters. If your lens is strong and heavy this might not be a big deal. This is true of massive cinema zoom lenses.
If you have a limited number of lenses, and don’t want to burden your rig with rods and supports, etc., a lens mounted matte box might be perfect.
Rod-mounted Matte Boxes
If the matte box has many glass filters on it, and flaps (we’ll look at these later), the weight might be too high for the lens mount to bear. This means it will need added support.
What will support it? There’s a solution for that. Rods:

A rod-mounted matte box is one that rests on 15mm or 19mm rods and not on the lens.
Rod-mounted matte boxes are attached to the rods. So, if you want to change lenses, all you have to do is move the matte box a little.
The disadvantages of the rod mounted system are that it adds to the weight. Not a good thing if you’re trying to keep things light. They are also the most expensive kinds of matte boxes.
If your camera system is on a tripod rig, on rods, then a rod-mounted matte box is a good idea. The center of the matte box is aligned with the center of the lens and the sensor. This is ensured by the standardized rod system.
What if you need both clamp-on and rod-mounted matte boxes? Do you need to buy both?
Not necessarily.
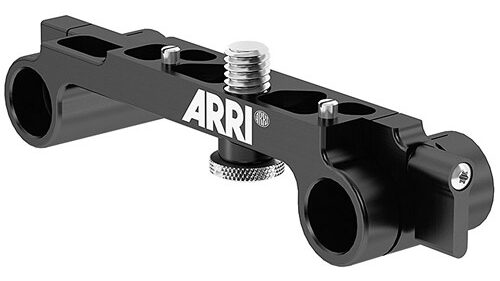
Some clamp-on matte boxes can also be fitted with rod support, as with the Arri LMB system. You just need the right accessories. You need to purchase a 15mm or 19mm rod adapter. It should be available as part of the matte box system you’re looking to purchase:
The next step is to see how we can avoid light leaks from the back.
How do you seal the back of the matte box?
Light can also enter from the back of the matte box if there is a gap between the lens and the circumference of the lens opening.
E.g., if the matte box has a 114mm hole at the back and the cinema lens you’re using has a front diameter of 95mm, you’ll have a gap of about 9.5cm all around. That’s about 3.74 inches. You can fit your hand through that!
There are two ways to seal this gap:
- Clamp-on rings or Clamp adapters
- Nuns knickers or Donuts
Clamp-on rings or Clamp adapters
Clamp-on rings are like step down rings for photography lenses, except you don’t screw them into the matte box, you just place them concentrically and then turn a screw to clamp it all down together:

An adapter is the entire plate, so they are more rugged:
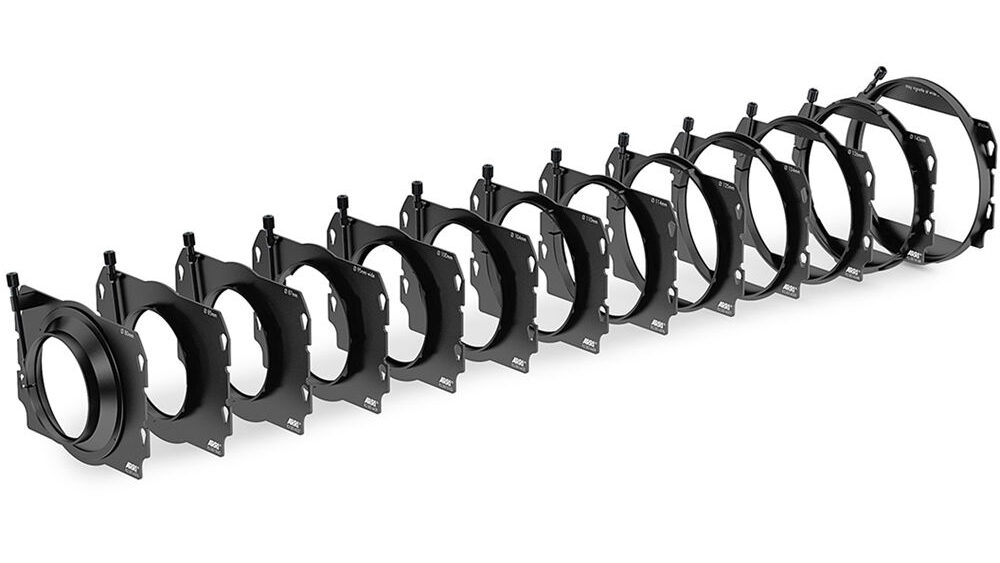
Since cinema lenses are made with standardized front diameters like 114mm, 143mm, 95mm or 85mm (typically), you just need to buy the adapters or rings specific to the lens set you’re using.
Buying the whole set is expensive and unnecessary. I have just the 95mm ring because the MMB-2 has a diameter of 114mm. This covers most cinema lenses I use.
In either case, once you attach the adapter or ring to the back of the matte box, the lens should fit snugly in, without any light leaks. The screw (that sticks out like a chimney) is to tighten this down so the matte box can be used as clamp-on.
If the matte box is on rods, you don’t need to tighten this, unless you’re swinging the entire camera like crazy for some reason.
Nuns knickers or Donuts
If you don’t want to buy different rings or adapters for each lens, and want a one-size-fits-all solution, you have what are commonly called nuns knickers or donuts:
Donuts tend to be sturdier because they’re typically made of rubber. Nuns knickers are made of cloth:

In the above image I’m using the Arri nuns knickers to seal the back. This can be adapted to any lens diameter smaller than 114mm.
Which is better?
From having used lots of matte boxes, I can tell you to avoid using donuts or nuns knickers. Even though they seem convenient, I’ve yet to find one that’s really not a pain to use.
The ones Arri makes often come off at the wrong time, and that’s a major fail. They also cause issues when manually focusing if the ring is close to the front.
However, when I use the matte box with lenses that are not 114mm or 95mm, I need them. In the above image I’m using Zeiss Super Speeds with a diameter of 80mm.
Anyway, now that we’ve sealed the back, it’s time to see if we can improve the front.
Top and Side Flags
A top flag is an absolute must-have:
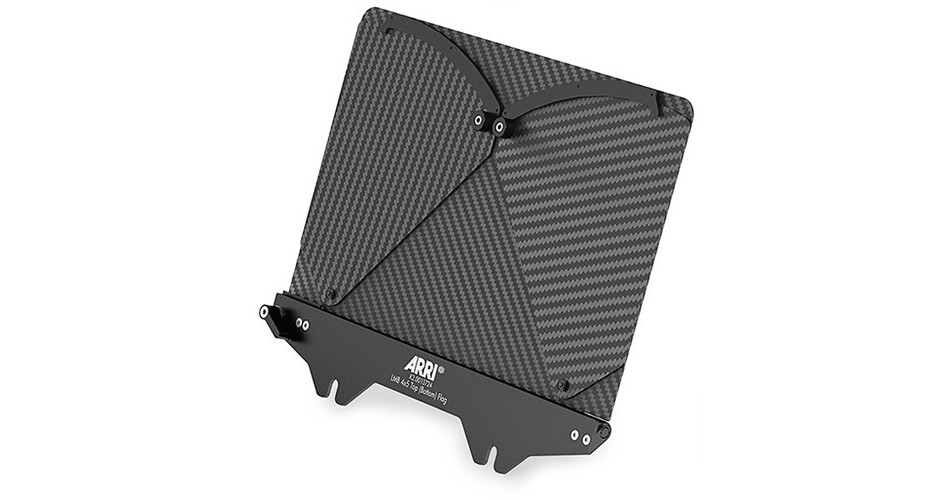
A top flag is important for the following reasons:
- You can protect the lens or any filters by fully closing it down. This happens more often than you think.
- You can flag stray flare from backlight or kickers or ceiling fixtures or sunlight. This, too, happens often.
I’ll be blunt to drive home the point: You’d be stupid to invest in a matte box without a top flag.
Important: A top flag must stay in place in any angle you need it. It must not move around or lose its position when the camera moves, or if there’s light to moderate wind. It would be terrible if the top flag slams shut during an important shot.
In fact, one of the ways expensive matte boxes are worth their money over cheaper matte boxes is the quality of their hinges and screw systems. The flags stay put.
What about side flags?
They are useful, too, especially when you have lights on set. You’ll notice good top and side flags have extenders so you can completely block out the front of the matte box:

This is useful in studio and product video situations, where there are lights and reflectors all over the place.
However, on the whole, I’ve seen I’ve only needed side flags about 25-30% of the time, but I’ve always needed top flags. Make of that what you will.
Flags are also called flaps or French flags.
If all matte boxes did was to cut out light, it would be eating up too much real estate on the camera system. What if it could do more?
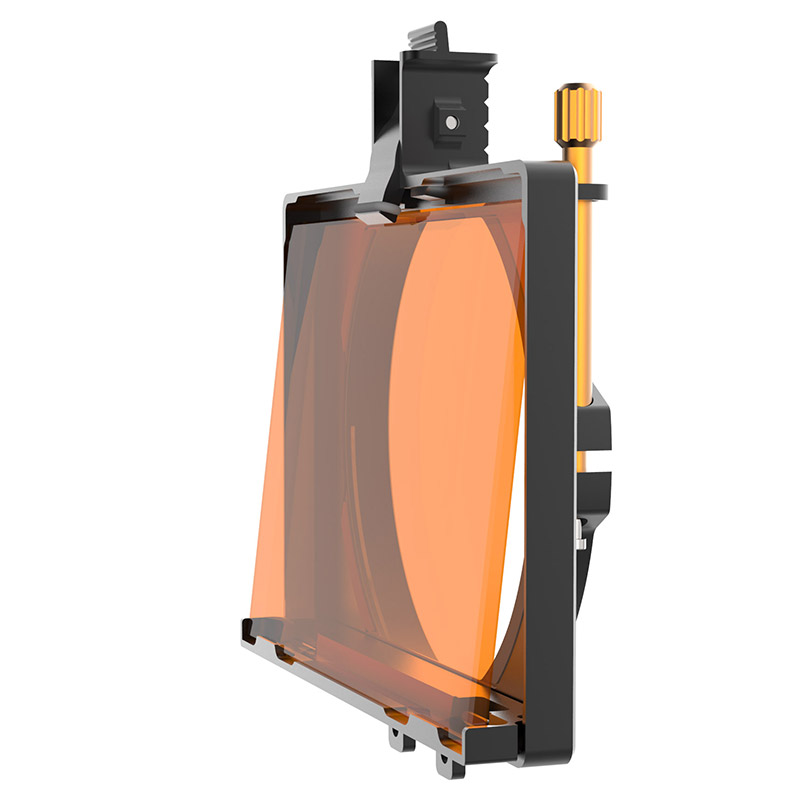
Filter Trays or Stages
Any matte box worth anything should have at least a top flag and one filter tray, like the Tilta Mirage:

This is what a filter tray or stage looks like:

It’s a hard frame, like a picture frame, except it needs to hold glass filters in them.
You’ll also notice the vertical screw on top. That’s to tighten the filter in place so it doesn’t fall out.
Important: Most matte box screws are positioned on top because that’s the easiest place for the operator or AC to reach.
There are three main sizes of filter trays or stages:
- 6×6″
- 4×5.65″
- 4×4″
4×4″ is a popular size of square filters in photography, though they are not large enough to cover the front diameters of cine lenses. I would not invest in 4×4 filters or 4×4 matte boxes for cinematography.
6×6″ is a special case for two situations:
- When you’re using lenses with really large front diameters, like the Angenieux Optimo Anamorphic 42-420mm A2S zoom which has a diameter of 136mm.
- When you’re using extremely wide angle lenses on full frame sensors or higher.
For this size you’d need a matte box with an opening of 143mm and a filter tray or stage size of 6×6″. The Arri LMB has a 6×6 size.
As an investment for the owner operator, I’d stick to 4×5.65 as the sweet spot. It is wide enough to accommodate most full frame lenses, even at conventional wide angles. I own Formatt Firecrest IRND filters in the 4×5.65 size for my matte box.
6×6 is typically a rental item. Not only are the matte boxes bigger to accommodate the size and weight of two or more glass filters in that size, they are more expensive as well. Moreover, 6×6 filters are also a lot more expensive.
Bottom line. Stick to 4×5.65.
How do you use a filter tray? Here are the steps:
- You slide it out of the matte box, from the top.
- You place the filter carefully in it and use the spring system to hold it in place.
- You slide in the tray back into its slot. It will fall into its slot with a click.
- You screw in the filter to lock it in place.
There might be three extra things you need the filter trays or stages to do:
- Have more than one stage, called stacking.
- Rotate
- Tilt
Either one of these features will cost more.
Filter stacking
You could have two or three filter stages:

Rotating trays
Rotatable filter trays allow you to rotate the trays or stages independently of each other. Why would you need that?
Two good reasons:
- You can use rotatable polarizing filters.
- You can use split or graduated ND filters and rotate them according to the angle you need.
Check the image at the top of this article to see how filters rotate.
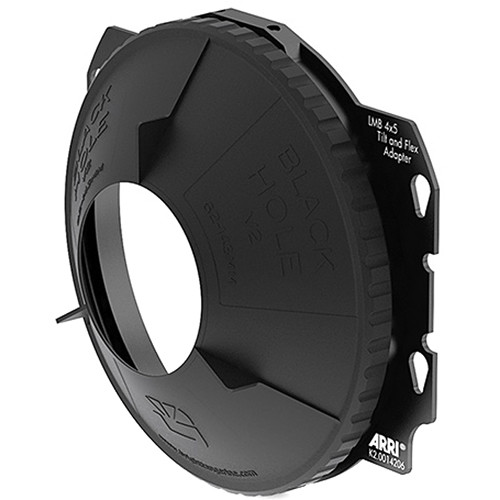
Tilt
The tilt feature is to slightly tilt the filter in the tray itself. You might need to purchase a tilt adapter for this.
Why would you want to tilt a filter? Typically, to avoid stray reflections. When you use two or more filters, you’re in danger of causing internal reflections. By tilting the filter ever so slightly, you can correct this issue.
Additional accessories
You can always add more features! Here are some important ones you need to know about:
- Swing away system or bracket. This allows the matte box to be opened (like a door) so you can replace lenses when in a rod-mounted setup.
- Accessory adapters. This allows you to attach accessories directly to the matte box, like Noga arms or whatever.
- Side handles. You can attach side handles to the matte box for handheld operation.
Here’s what the entire spectrum of possibilities look like:

What to look for in a good Matte Box
Here’s a checklist of things you need to watch out for:
- Build quality, preferably of metal construction.
- Quality of the ‘moving parts’.
- As lightweight as possible.
- It should have a great top flag.
- It should have the provision to hold one or more filters securely. Filters are expensive, you don’t want them to fall and shatter.
- It should be able to take all the lenses and filters you need for your work.
If you have a matte box that ticks all of the above boxes, it’s a winner.
You’ll find tons of matte boxes online, and it’s hard to understand why some matte boxes are as expensive as a lens. It’s hard to explain, except in engineering terms. The parts of a matte box are used a lot. And I mean, a lot.
Filter trays are swapped and replaced daily. Top flags are moved all the time. These things have to last for years. Cheaper matte boxes fail miserably when really put to the test.
You get what you pay for with matte boxes. Buy an expensive one if your work can pay for it, and you can do your job more efficiently and faster if you have them.
Do you need a matte box? Yes, for cinematography use. No, if you can barely manage to pay for the camera and lens.
But whatever you do, don’t cheapen out on a matte box just to show off. A plastic poorly-made and impractical matte box will not fool anyone.
Which matte boxes do I recommend?
Here are three that I’ve already covered in this article, at different price points:
- Cheap: Tilta Mirage Matte Box (on Amazon)
- Value for money: Bright Tangerine Misfit Atom (on Amazon)
- The ultimate system: Arri LMB system
Matte boxes can be as simple or as complicated as you need them to be.
Once you can estimate which filters you need and how many of them you’ll be stacking, it will be easier to arrive at the right matte box for you. Pair that to an estimate of what lenses you’ll be using, and should be able to narrow down your choices quite easily.
Hope this monster guide helps!
This is one of the best, well written pieces of advice I’ve seen on just about any product.
Thanks
Jim
You’re welcome!