
In this guide we’ll look at:
- What lens filters are.
- Why we need them.
- The important types of filters and how do they help?
- Things to look out for in a good filter.
- Examples and suggestions for good filters for cinematography.

What is a lens filter?
When we normally use the word ‘filter’, we think of it as something that takes away unwanted stuff. In cinematography, though, a filter is something that manipulates light entering a camera system.
There are three main places you can put a filter:
- Before the lens.
- After the lens and before the lens mount.
- Before the sensor and housed inside the camera body.
The first two are called Lens Filters, while the third are called Camera Filters.
A lens filter can be fixed before or after the lens:

In this guide we’ll cover lens filters, because that’s what you can buy and use. Camera filters are mostly built-in.
Depending on various factors, you can add more than one filter. The process of adding more than one filter on a lens is called filter stacking.
A few things that are not lens filters
Technically, anything that filters light is a filter, but in popular usage we don’t consider the following to be lens filters:
- Lens coating – Every lens is coated with various substances to reduce scratches, flare, reflectance, etc., or even for artistic reasons. These coatings are beyond our control and gives each lens its character.
- Lens hoods, scrims, barn doors, flags and other physical objects designed to block light.
- The black coating inside a lens – light should pass through a lens directly onto the sensor, without bouncing around anywhere. This is why the interiors of lenses are painted jet black.
- Adapters, bellows, tubes, shims, etc. – anything that increases the distance between the lens and the lens mount.
In popular usage, when people use the term lens filter, they mean something that looks like these things:

Lens filters are either circular or rectangular pieces of glass or plastic – each with a unique ability to manipulate light or extend the capabilities of a lens to:
- Greater creative effect, or
- Deal with unwanted lighting conditions, or
- Correct problems in the camera-lens system.
The key defining characteristic of filters is that you can add or remove them at will.
Where do you put filters?
The most popular place to put filters is at the front of the lens. The objective here is to modify the light before it enters the lens.
On the other hand, some lenses come with filter holders at the back:

Putting filters at the back has the disadvantage that every time you want to change filters, you have to remove the lens and expose the sensor to the elements.
On the other hand, you could have lens adapters that take in filters:

Some lenses also allow you to drop in filters between optical elements. E.g., the Angénieux IOP (Integrated Optical Palette) system allows you to drop in two kinds of modifiers inside the lens (in addition to a third rear filter element):

Why filters are always ‘bad’
Filters are basically a slab of glass or plastic, and this is how light behaves with a slab of glass or plastic:

Light that comes in from the center along the optical axis goes straight through. Light coming in at an angle usually refracts (passes through, but with a deviation). Some light also reflects (not a good thing at all).
Let’s look at some disadvantages inherent in filter design:
- The above image is what happens in a perfect world. In real life, there are always manufacturing and design defects that make it tough to prejudge what the resulting effect is going to be. Minor variations in the glass will lead to unwanted effects like increased flare, ghosting, vignetting, loss of contrast, etc.
- The front element of a lens is spherical, while a filter will be flat, or flatter.
- Because the filter frame protrudes outwards, any moisture, water, dirt, etc. that collects on the filter will remain on the filter unless you thoroughly clean it.
- Every subsequent filter in the stack will further degrade performance, especially the amount of light hitting the sensor and its contrast.
- Any coatings on the filter might interfere with the job of the lens coating.
Don’t get me wrong. Some of the ‘ill-effects’ of filters are desirable, the others are acceptable compromises. You have to test each filter-lens-camera combination in different lighting conditions to know if it works or not.
Stick to this rule of thumb:
Never buy cheap filters.
What you want is a good synergy between the capabilities of your lens and your filter.
Let’s look at a few popular filters.
The Clear Glass Filter
It doesn’t get any more basic than this! It’s an uncoated glass filter that tries not to change anything at all. It’s sole purpose is to protect the front element of a lens.
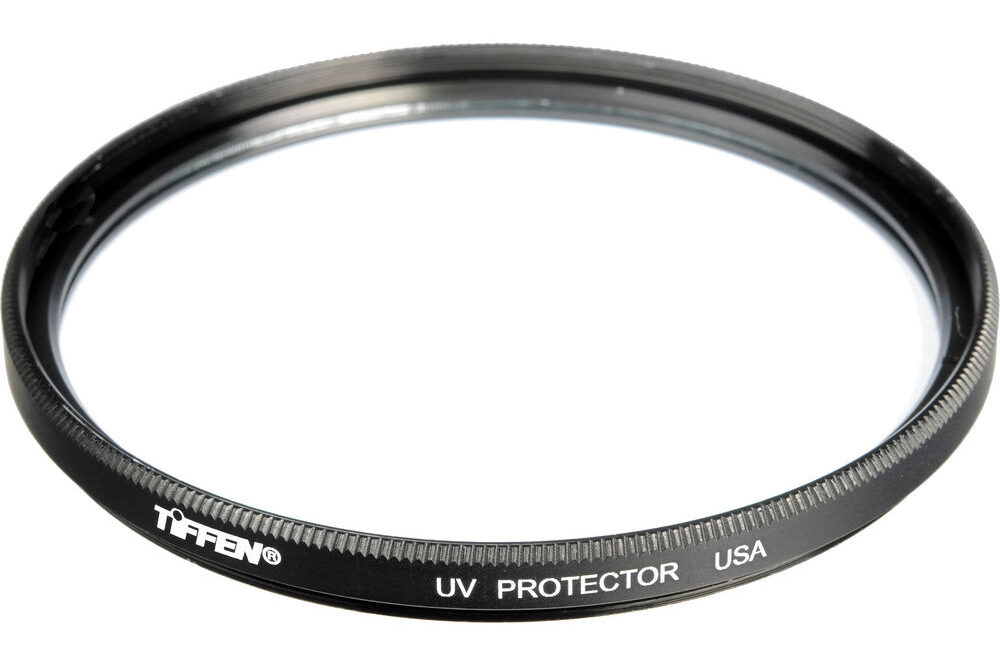
The Ultraviolet (UV) Filter
This filter is the next step up. It adds one feature to a clear glass filter.
A UV filter tries to cut out ultraviolet (UV) light, while passing everything else.
UV light might cause haziness in the sensor, though modern sensors are not very sensitive to UV light (film stock is, though).
Typically, UV filters are harmless filters left on the lens, sometimes forever. Why would anyone want to do that? UV filters, because they don’t negatively impact the image, are usually left on the lens to protect it from the elements, or from being scratched due to incorrect cleaning practices or the occasional bump or drop.
A scratched filter is cheaper to replace than a scratched lens.
Cinema lenses typically don’t use UV filters.
Are there any negatives to having a UV filter on permanently?
Some argue that having an additional optical element unnecessarily degrades the image, especially if it is a cheap UV filter. If you use a good filter, this point is a non-issue, in my experience.
One important negative is that the filter can get stuck to the lens thread if not regularly removed and cleaned.
My recommendation is, if you’re not using a matte box or any other filter, keep a UV filter on. But no matter what you do, don’t put on a cheap UV filter. It’s the height of stupidity to buy an expensive lens and degrade its quality with a crappy filter.
Ratings on UV filters
Just like sunscreen, UV filters come in different ratings. Three common ratings are:
- L37 – removes UV light with a wavelength shorter than 370 nm.
- L39 – removes UV light with a wavelength shorter than 390 nm.
- No rating! Nowadays you’ll find UV filters with no ratings, because sensors aren’t affected much by UV radiation.
Note: There are also ‘UV filters’ that only let in UV light, while blocking everything else. This is not generally used in cinematography.

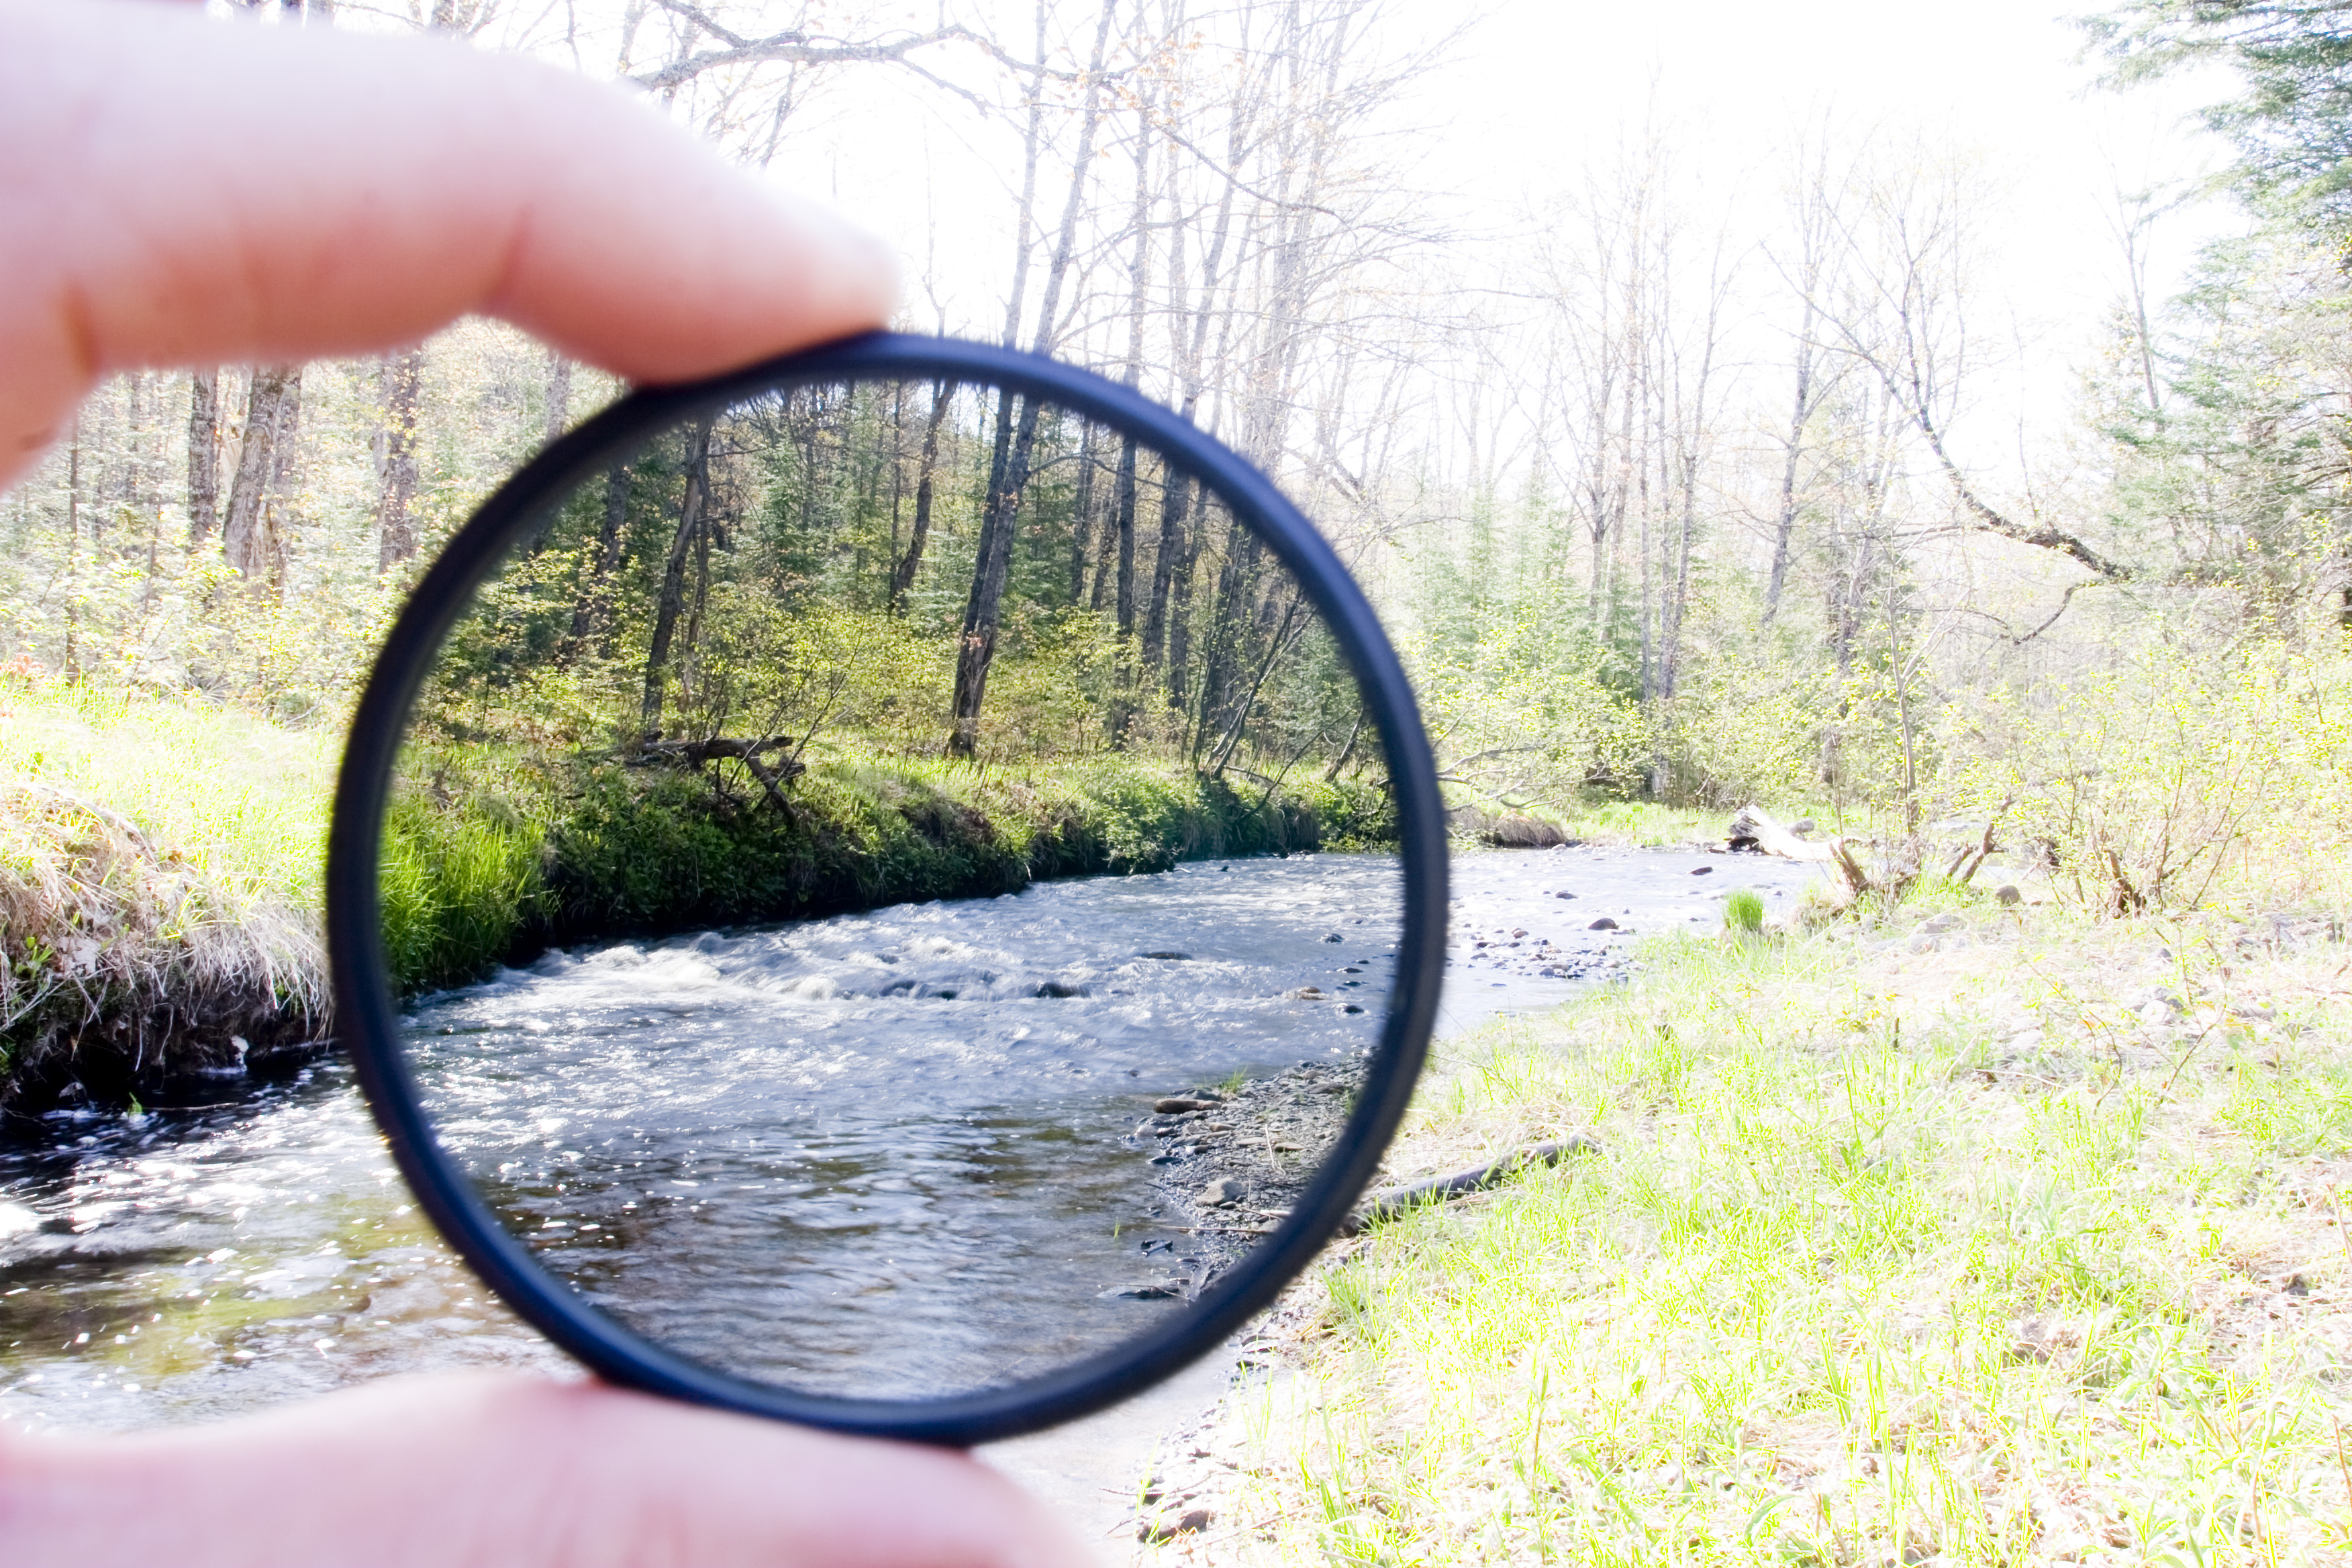
The Polarizing Filter, or Polarizer
Naturally occurring light can bob up and down in one axis in one cycle and then change to another axis in another cycle, and so on. It doesn’t stick to one orientation.
This is what it looks like:

This is called unpolarized light. To ‘discipline’ this light into one orientation, you can pass the wave through a slit, and get this:

We don’t need to get any more technical than this. How does it work practically?
Some kinds of light in nature are polarized (it’s not 100% guaranteed!):
- Reflections
- Some light from the sky
A polarizer can block certain reflections and certain kinds of sky light.
For example, if you’re filming a glass surface, shiny floor or car, or a still pool, and want to eliminate reflections, a polarizing filter is your weapon of choice.
For the sky, a polarizer only works generally in one angle, somewhat 90o from where the sun is. What does it do? It generally adds more saturation and ‘pop’, for lack of a better word:

Notice the shadows in the above image, which shows you the sun is at an angle of 90o (perpendicular) to the direction the lens is pointed at.
You’ll see its best effect only at certain angles. At other angles the effect will hardly matter.
A polarizing filter can be rotated independently of it being screwed on to the lens:

I included the above text so that you realize the importance of angles in polarization. Your angle in relation to the sun, and the angle of the lens in relation to the horizon and the magnetic poles will determine how useful the polarizing effect will be.
Now, there’s a problem with linearly polarized light – for the camera sensor:
- It might throw off the sensor’s autofocus mechanism.
- It might affect the optical low-pass filter in front of the sensor.
- It might affect the metering.
Is there a way to linearly polarize light, and then throw it out of whack again just before it hits the sensor? Sure, such a filter is called a Circular Polarizing Filter. What these do, is they first linearly polarize light, and then change the polarization to a circular pattern (not unpolarized) which is okay for sensors:

There are two kinds of polarizing filters – Linear and Circular. Since Circular Polarizing Filters do more work, they are also more expensive. Both of them do these things:
- Darken the sky.
- Remove reflections from water, mirrors, shiny surfaces, etc.
- Take the gloss off shiny surfaces.
- Increase color saturation.
Which type of polarizer do you pick? Stick to Circular Polarizers (CPL).
They do everything linear polarizers do, and they are not hard on your camera’s exposure meter or sensor.
Is there a disadvantage to CPLs?
Of course! Look at the moving GIF image above. Notice how the light gets blocked the more you polarize something? CPLs cut down light, which is not something you want in an interior location.
For this reason, I recommend you only use polarizers when you need something specific out of them. And when you do use them, always know how much light they cut out.
Now let’s look at the most popular lens filter.
The Neutral Density (ND) Filter
These work like sunglasses. They cut light. For outdoor filmmaking they are almost a necessity.
ND filters are measured in stops of light cut:
| ND Number | Optical Density | Stops of Light Cut |
| No ND | 0.0 | 0 |
| ND2 | 0.3 | 1 |
| ND4 | 0.6 | 2 |
| ND8 | 0.9 | 3 |
| ND16 | 1.2 | 4 |
| ND32 | 1.5 | 5 |
| ND64 | 1.8 | 6 |
| ND128 | 2.1 | 7 |
| ND256 | 2.4 | 8 |
| ND512 | 2.7 | 9 |
| ND1024 | 3.0 | 10 |
Finding it hard to remember? Use my method of 1-2-3:
X stops = 2X ND = 0.3*X Optical Density
To remember: 1 stops, 2 ND, 3 OD
E.g., if you want to cut four stops of light, then:
- 4 stops of light = 24 ND = ND16
- 4 stops of light = 0.3 x 4 Optical Density = 1.2 Optical Density
Not that hard anymore, eh?
The three kinds of ND filters
There are three broad classes of ND filters:
- Fixed value ND filters
- Variable ND filters
- Split or Graduated ND filters
Fixed ND filters
Fixed value ND filters can only cut a fixed amount of light. To cut more (or less) light, you’ll need another fixed value ND filter with a higher (or lower) ND number. If you work in constantly changing lighting conditions, you’ll need to carry many filters, each with different values of ND.
This is why cinema cameras usually have built-in ND filters. You’ll rarely have a feature length shoot without using some form of ND.
Fixed ND filters offer the greatest precision. When it says ND32, you know for sure it’s going to cut exactly 5 stops of light. If you’re lighting a set and want to reduce exposure by a definite amount, these filters will offer you great control.
Sometimes, a high-quality fixed ND filter will also help in IR filtration, as we’ll see later.
Variable ND filters
Variable ND filters allow you to change ND with just one filter, though they cover a limited range of ND.
They are convenient because you can buy just one filter that covers the range you want. When light changes, all you have to do is rotate the filter, which increases or decreases the amount of light cut.
The disadvantage with these filters is that you don’t have the exact precision of fixed value ND filters. The other disadvantage, which is why they’re rarely used with cinema lenses, is that they create artifacts under some conditions.
If you’re going for variable ND filters, get the best.
Split or Graduated ND filters
Split or Graduated filters are ND filters with the ND over a limited area, and the rest is clear.

These are useful when you want to cut down an area that can be divided linearly across the frame. If you have moving elements in your frame, or if you’re moving the camera, a graduated ND filter won’t work the way you want it to.
However, these filters have their place. The two most common scenarios for use are:
- Reducing a bright sky.
- Splitting an interior and exterior location (it can also be used vertically!).
In interior locations, we are usually starved for light, and an ND filter will rarely be used. However, if you want a wide open aperture but the lights are still too bright even at their lowest setting, an ND filter will help you get the job done.
For exteriors, it would be ridiculous to venture outside without one.
If you are new to filters, and are just starting out, I highly recommend you start with one variable ND filter and one split or graduated filter.
Diffusion Filters
These filters soften the image, which can be a good thing when dealing with skin.
Like ND filters, diffusers have different ‘powers’, depending on the intensity of the effect you are after. E.g., the Tiffen 77mm Glimmer Glass Filters are numbered 1, 2, 3, etc – where 1 is the subtlest effect and it goes up from there.
It is in your best interest to test multiple diffusion filters thoroughly before use. Not only must you look at the image on set, but also study its qualities on a large broadcast monitor to see how it will match with shots that are cut before and after it. If you don’t take the discipline and pain to test diffusion filters, the results can get tacky.
You don’t always have to use glass to soften an image. You can use stockings, nets or petroleum jelly spread over a UV filter. I know you’re shaking your head at the last suggestion, but if you want to isolate only certain portions of your shot for diffusion, it’s a powerful DIY skill to have!
It’s tough to form generalized categories for diffusion filters, but in general, ask these questions:
- How much transparency or diffusion do they provide?
- Do they vignette? E.g., do they diffuse more at the center than at the sides, etc.?
- How many stops of light do they cut?
- Do they change the colors in your shot?
- What kind of texture will you get at the end?
- How does it handle highlights and shadows?
- What happens to the bokeh?
- How does the flare characteristics change?
- Do you get reflections, double images or ghosting?
- Are you losing a lot of sharpness or resolution?
- How does it make the skin tones look?
Some of the most popular diffusion filters are:
- Pro Mist and Black Pro Mist
- Satin and Black Satin
- Glimmerglass
- Pearlescent
Diffusion filters form an integral part of any cinematographer’s arsenal of tools.
It’s so much easier and cheaper (and not to mention more artistically satisfying!) to get certain effects on camera rather than in a color grading suite. But it takes a lot of experience to use it creatively and with intent.
This means, a certain brand of filter becomes as cherished as a lens is!
The Angénieux IOP (Integrated Optical Palette) system is a lens system that includes diffusion filters for various effects. The palette includes:
- Inter-changeable iris: 3 blades, 9 iris blades, oval
- Internal glass elements: many types
- Screw-in Rear filter
You can have one type of diffusion in the internal tray, and another in the rear tray. To see how this works, check out this page.
The Infrared (IR) Filter
All camera sensors are sensitive to infrared (IR) radiation. This causes unwanted color casts on an image. Most modern cameras have in-built IR filters to prevent such issues.
You don’t normally see the issues with IR radiation until you start to use ND filters. When you use higher value ND filters, you cut out more light. Cheaper quality ND filters stop visible light, but not IR radiation.
What this does to the image is, it introduces a reddish or brownish cast. The higher the ND, the greater the cast. Different camera sensors react differently to IR, so without testing there’s no way you are going to know how to begin correcting for IR.
It’s better to correct these issues on location with a filter than try to fix them in post production. The major problem in trying to do the latter is, the color cast isn’t uniform throughout the image. Various colors and objects in the scene reflect IR differently.
ND filters with IR filtration built-in will typically use the words ‘IRND’, though it has been called other things. Most ND filter brands for cinema use will also typically come with IRND variants.
Ultimately, you can use IR filters in one of these ways:
- With a variable ND, use a dedicated IR filter at certain values only. Obviously, this is tedious.
- With a fixed ND, use a dedicated IR filter if necessary.
- Use a fixed ND filter with in-built IR filtration. This is the best scenario, though not always practical if the rental company doesn’t have it.
Note: What I have described in this section is an IR blocking filter, the purpose of which is to block IR radiation. There are also IR filters that only lets in IR radiation, which leads to interesting creative results.

Diopters
Close up diopters allow you to focus closer. This is useful if you’re using a lens for macro or close up work.
If you’re filming with anamorphic lenses, diopters are almost a necessity, since most anamorphic lenses don’t focus close enough. I would pick all three strengths: +1, +2 and +3 because they’re all useful.
How to Mount Filters
Filters can be divided into two broad groups:
- those that screw directly on to the lenses, and
- those that are used on matte boxes or filter holders.
Which type you choose will depend on whether you need a matte box or not.
Circular Threaded Filters
A circular filter is screwed on to the front of the lens. Sometimes, circular filters themselves have threads so that you can screw another filter on it, forming a filter stack.
You’ll find the filter thread size on a lens at the front or the side, alongside the Greek letter ‘phi’ (?). It’ll look something like this (look at the top):

This value is what you need to match when you buy threaded filters. In the above case, if you want to buy a filter to screw on to the Canon 40mm lens, you’ll need a filter with a 52mm size.
What are some of the disadvantages of circular filters?
One problem with screw-filters is that you might have to buy different filters for each lens filter thread. E.g., the Canon EF 24-70mm f/2.8L USM has an 82mm filter size while the Canon EF 70-200mm f/2.8L IS II USM has a 77mm filter size. You can overcome this problem by using adapters called ‘Step Up Rings’ to match the filter with the thread of your lens. Talk about the tail wagging the dog!
Secondly, circular filters are difficult to stack. Let’s say you you’ve stacked three filters and have now decided to remove the one in the middle. How many filters will you have to unscrew to get the job done?
Traditionally, circular filters have been a good fit for photography and some videography. They are light, and along with lens hoods, are easy to carry around. If you know you’re going to use only one or two kinds of filters, with common thread sizes, then circular filters will save you a lot of time and hassle.
However, for cinema use, you pick rectangular filters with matte boxes.
Filter Holders
Filter holders are also mostly used in photography:
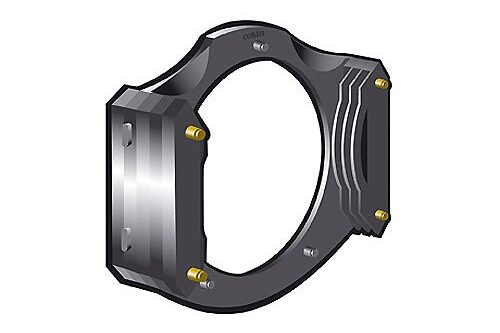
You can use standard size filters and carry a few holders that match your lens filter thread size. The big advantage of filter holders is that you can stack and remove filters easily.
The big disadvantage of filter holders is that they are fragile, and you have to handle your camera, filter and holder with care. I wouldn’t recommend them for video use (trust me, I’ve tried!).
Good filters are not cheap, and some even cost more than a lens!
Matte boxes
A matte box is just another step up from a filter holder, but much more solid, versatile and robust. On the other hand, it is much larger, heavier and slower to work with.
Matte boxes don’t have a universal standard for filter sizes. Some take both rectangular and circular filters.
Common sizes (in inches) for rectangular filters are:
- 4×4
- 4×5.65 (Panavision size)
- 5×5
- 5.65×5.65
- 6.6×6.6
Before buying, check the filters to see if they are compatible with the lens or matte box you have chosen. A standard size will give you more options.
As a general rule of thumb:
For full frame sensors pick 4×5.65 and above.
Suggestions for Filters
I will list both screw mounted (mainly 77mm filter size) and 4″ x 5.65″ matte box mounted filters, but these are just suggestions. The principle is the same for any size.
Don’t forget testing! Here are my suggestions:
| Filter Type | Circular | Rectangular (4″ x 5.65″) |
| UV | B+W UV (Amazon, B&H) or Tiffen UV (Amazon, B&H) | Don’t bother |
| Polarizing | B+W CPL (Amazon, B&H) | Tiffen 138mm CPL (Amazon, B&H) Formatt Linear (B&H) |
| Fixed ND | Tiffen IRND (Amazon, B&H) | Tiffen IRND (Amazon, B&H) Formatt Firecrest IRND (B&H) – I own these. |
| Variable ND | Tiffen Variable ND (Amazon, B&H) | Don’t bother |
| Grad ND | Tiffen Grad ND (Amazon, B&H) | Tiffen Grad ND (B&H) |
| Diffusion | Tiffen Diffusion Filters (Amazon, B&H) | Tiffen Diffusion Filters (Amazon, B&H) |
I’ve only covered the most popular kinds of filters.
One major category I’ve left out (because I feel they are redundant) are color filters. When people shot on film they were useful, especially with black and white film stock. Today, you can easily manipulate color in grading.
Similarly, it is easier to add color gradients in post production, with more accuracy, than it is possible with filters. With modern cinema cameras with great dynamic range, you can achieve a lot of the graduated ND and polarizer filter effects in color grading, too. The tools are always evolving!
That’s it for my monster filter guide. Treat filters like lenses, and you’ll be okay!