
Your desk is where your film actually gets made. But most filmmakers treat their workspace like an afterthought. It’s understandable – having a neat desk isn’t something they teach you at school.
If you didn’t know, take it from someone who’s worked on all kinds of desks for over two decades – home desks, professional offices, grading studios, mixing and mastering studios, and everything in between:
A smart desk setup will save time, reduce stress, and make the creative process smoother.
This guide breaks down everything you need to build the ultimate filmmaker’s desk. Every piece serves a purpose. Whether you’re editing, color grading, sound mixing, or all three, your desk should work as hard as you do.
Let’s build a setup that helps you!

Why Your Desk Matters
Your desk is mission control for every project. A well-planned setup cuts friction and saves time. It also keeps your body healthy during long editing marathons.
If you spend hours color-grading, prioritize the reference monitor. If you juggle sound design and editing, focus on being positioned in the triangle.
Whatever your objective, a clear goal will eliminate unnecessary purchases and will show you the path to what’s right for you.

Choosing the Desk
If you’re on a budget, a chair is more important than a desk. Good desks are expensive, but cheaper desks that are stable will get the job done until you can afford better ones.
Tip: Pick a desk that supports all the monitors and accessories.
If you can afford it, pick a desk where you can adjust the height according to the chair. If not, pick one that’s the standard size or lower. Don’t get a high desk! Here are some things to consider:
- 60-65″ width to accommodate three monitors if necessary.
- 30″ depth if you need it.
- Four legs because it’s stable. However, for more expensive models, two legs are better.
- Don’t get tables with the back blocked or any side blocked.
- The surface shouldn’t get warped. Wood is great, at least an inch or an inch and a half thick.
A standard 60″-65″ desk (Amazon, B&H) is sturdy enough. You can get them between $100-500 depending on your budget. If money is tight, just get simple, solid desk.
Don’t overthink this one.

The Chair
A good chair prevents injuries and those annoying niggles. You can get elbow and wrist pain, or back or hip pain, or knee pain in just a few months on a badly designed chair.
Don’t buy a cheap chair. I burned through tons of cheap chairs. They look great on day one but in just a few months the screws start to loosen, things don’t move right, etc.
And then, after many years of frustration, I bought a Herman Miller Aeron. It’s expensive, but this chair has lasted me close to ten years now, and it still looks new!
Here’s my tip: Sit on the chair you’re planning to buy. Make sure the height is adjustable so your elbows are parallel to the surface of the desk. The back has to be adjustable as well.
And most importantly, get a good foot rest (Amazon, B&H). When you’re done adjusting your chair and desk, you’ll most likely not be in an ideal position with your knees and feet. Ideally the knees should be lower than the hips, and feet should be flat on the floor or rest.
For monitors, read this article:
Do you need a glare shield or monitor cover? No. Not in a studio setup unless your lighting is off. Change the lighting, it’s cheaper to do!
The Keyboard
A gaming keyboard should do fine, because you’re going to be hitting the keys a lot with any editing software or DAW. Something like the Corsair K55 (Amazon, B&H) should work great.

I would only go for an editing keyboard once you’re a professional and you have everything else down pat.
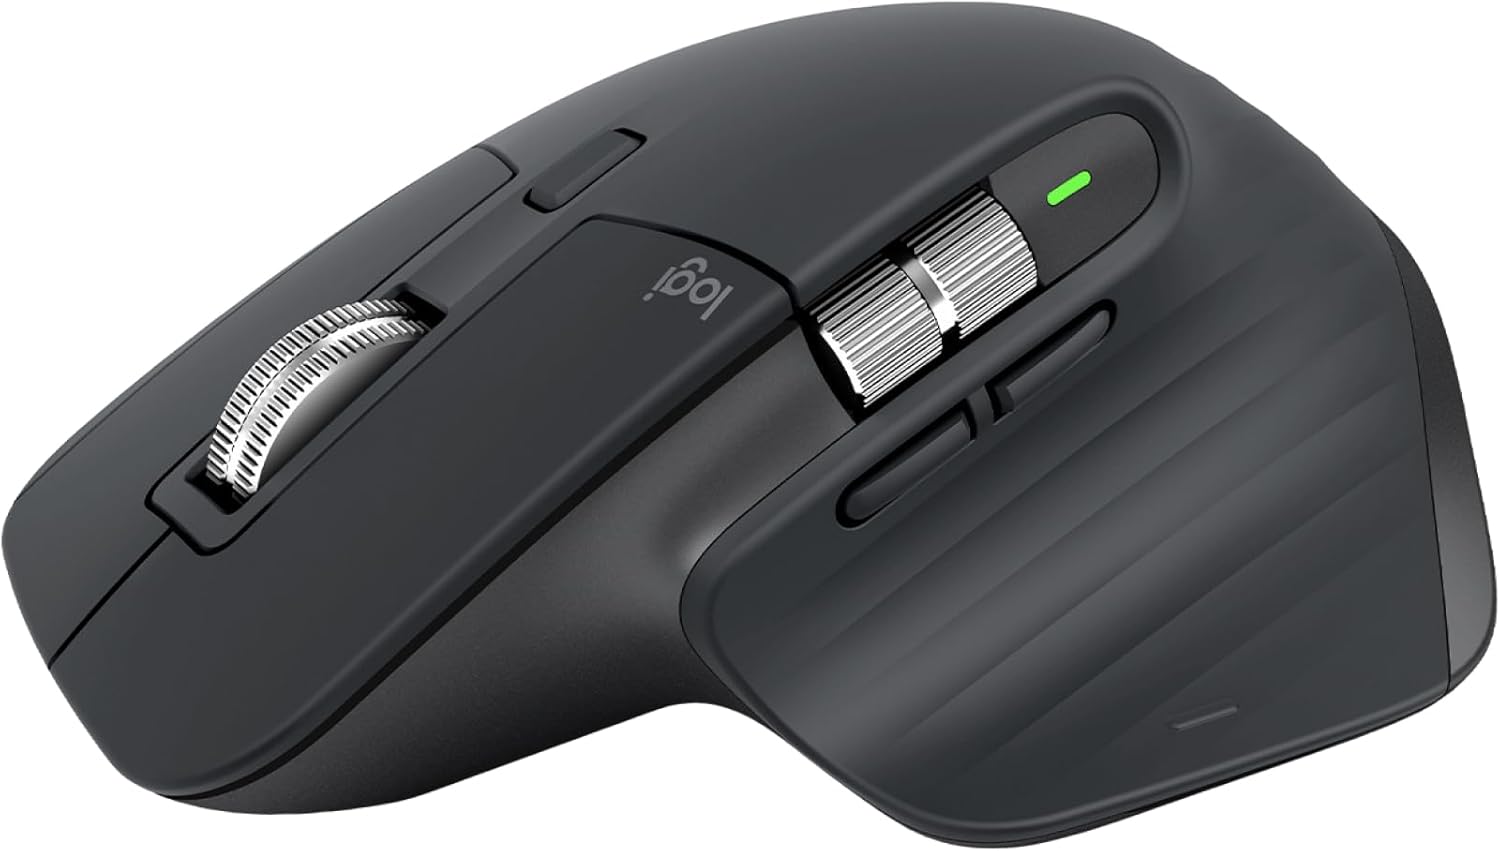
The Mouse
A mouse should feel like an extension of your hand. It’s more important than a keyboard. I’ve burned through cheap keyboards (just buy a new cheap one when the old one gets beat up) and it’s not as painful as having a cheap mouse.
The Logitech MX Master series (Amazon, B&H) is hands down my favorite. It’s especially great for grading work because you’re always using the mouse. I’ve been grading for two decades, and I’m perfectly okay with just a mouse and keyboard.
What about Control Surfaces?
Do you need control surfaces? Here’s my honest opinion: No.
In this economic climate, even pros can save tons of money (in both equipment and space) not owning a control surface. There used to be a time when a client gave you work based on the control surface you owned (because that’s all they could see). Today, it’s more about the hourly rate.
So, if you can edit, grade or mix just as well with a mouse and keyboard, and the client isn’t paying you top dollar so saving a bit of time isn’t that big of a deal, then I cannot recommend a control surface with a straight face.
If you’re grading on Resolve, I recommend a Blackmagic Design surface (Amazon, B&H), and if you’re using a DAW, pick the one that goes with your DAW. I use M-Audio, but it doesn’t matter to anyone but you. Today I’ve seen too many mixing engineers not even touching the mixing console – it’s just a show for the ignorant client.
Audio Monitoring
If you’re really on a budget, edit and monitor audio on headphones. Get a Sony MDR-7506 (Amazon, B&H). It’s good enough, and does double duty as a field monitor.
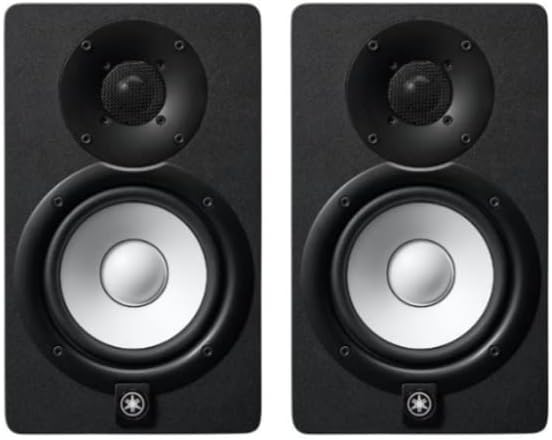
For an interface, I recommend the Focusrite Scarlett 2i2 (Amazon, B&H) for great preamps (if you’re also recording audio). You can connect a pair of headphones and audio monitors to it, too, for a great compact setup that will fit your desk.
For monitors, on a really tight budget, pick the M-Audio BX4. For a decent budget pick the Yamaha HS5 (Amazon, B&H), and for an even better experience pick the Adam T8V (Amazon, B&H). I own the Adam A7X, and it’s better than me.
For studio microphones, check out these articles:
Lighting the Desk
If you have a back-lit keyboard and mouse you really don’t need to light your desk except with whatever ambient light you have in the room. Don’t go for crazy LED lights or whatever. It might look cool today, but it gets old very fast.
Just make sure your room is let with high CRI LED lights, and has a reading of about 300-500 Lux on the table (if you can measure it). It’s great if it’s dimmable. 5600K.
Don’t overthink this. If you can’t control the lighting, at least get high CRI lights or gel them to eliminate green spikes.
Basic Data Storage Solutions
I’m not going into details here, or what you have inside your PC. But there are two situations that are sort of bread-and-butter for every editor, mixer or colorist.
Fast external drives so you can move data from A to B. Pick Samsung SSDs (Amazon, B&H). The higher the capacity, the better the sustained speeds and thermals.
Archive long projects on a Synology NAS (Amazon, B&H). At least four bays. Use Seagate or WD NAS drives, at least 10 TB or higher (Amazon, B&H).
If you don’t want to invest in a NAS, the least you can do is upload everything to the cloud. Pick iCloud, Google Drive, Backblaze, Amazon S3, Vimeo, whatever – it might be enough to get you by in the beginning.
However, as file sizes grow you’ll realize a NAS works out cheaper, and you’ll need it anyway for quick access if a client asks for it.
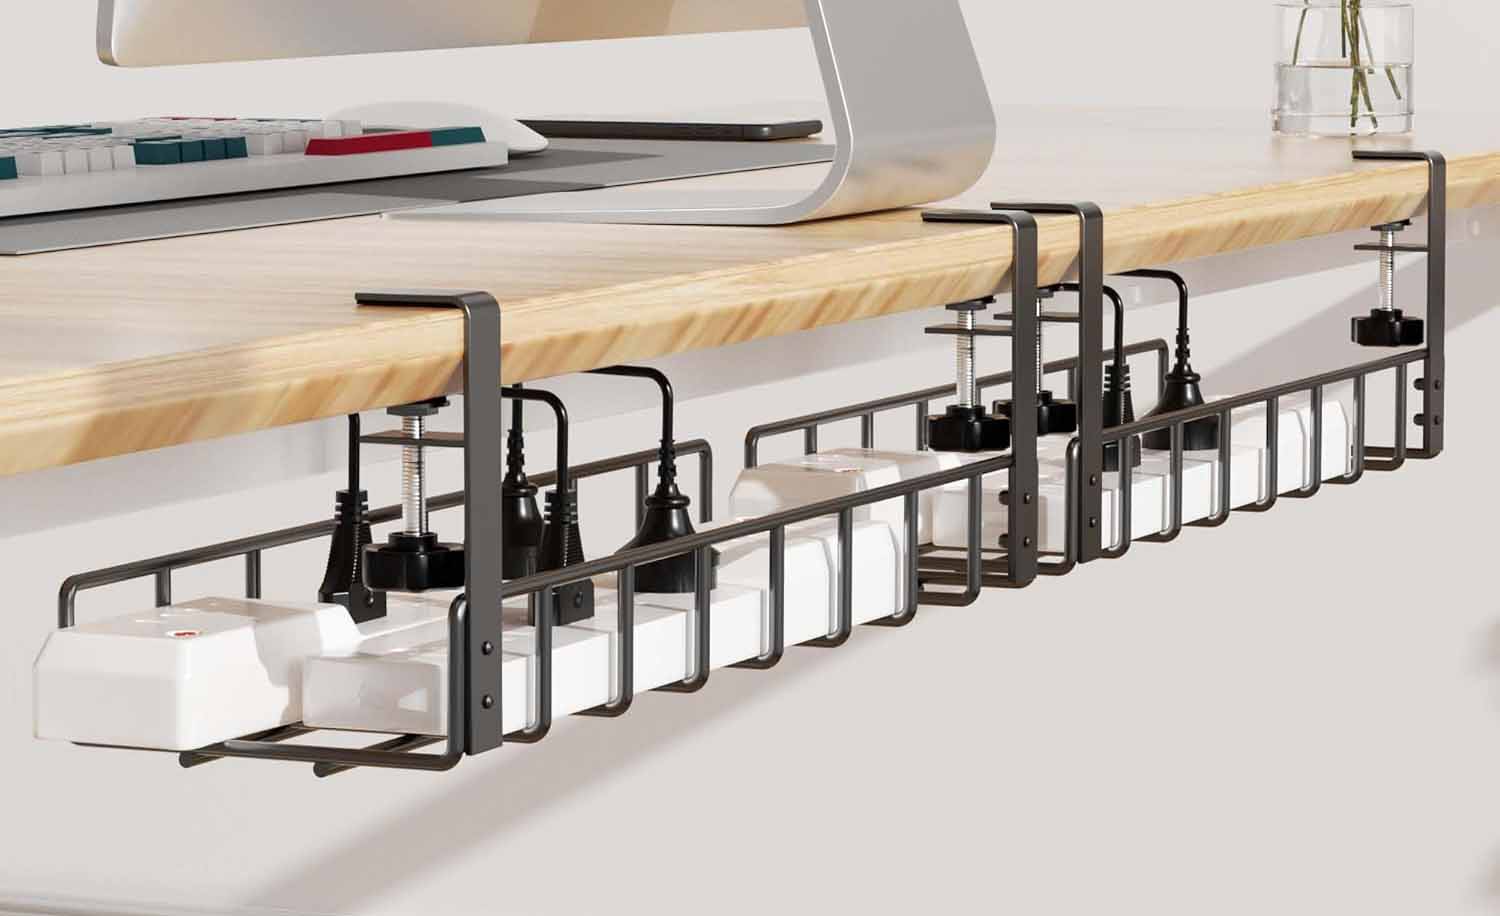
Cable Management
Messy cables are a personal thing. Some people just don’t want an organized desk, or can’t do it – and it doesn’t bother them. If that’s you, you can move to the next section. No amount of advice is going to change you until you first decide it is important.
To me, messy cables sap focus. But the biggest issue is when I need the extra space for something, and cables come in the way. Sometimes you need to plug or unplug something, and it’s hard to reach between the jungle you’ve created.
The simplest thing you can do is invest in a cheap cable sleeve and run everything through it. The color can match your desk or setup and everything will look neat and tidy.
The power strip can hide under the desk tray, and it makes a big difference.
The last simple thing you can do is label your cables at both ends. Trust me, when you have many accessories connected it’s hard to find out which cable to pull out or whatever. Get cheap electrical tape in many colors and that’s all you need.
If you need a space for the iPad or mobile phone, a few pens or markers, etc., get an iPad stand and stationary organizer.
And finally, if you have headphones, get a headphone stand with a low footprint.
Networking and Power Backup
Unstable power ruins renders. An APC UPS (Amazon, B&H) provides pure sine output. It also lets you save your work in a power cut situation.
This is a mandatory thing especially if you have a NAS or live in an area where the electricity isn’t stable.
Setting Up Audio Treatment
Ready? Don’t get stupid acoustic panels for the walls.
The first thing you do is lay a carpet under your desk and chair, the largest you can afford and the thickest you can afford – and vacuum.
The second thing you can do is lay a rock wool panel or even another thicker carpet above you. Find a way to fix it to the ceiling.
These two changes will drastically change the reverb in your room. Try to isolate the room as much as possible from external noise. The microphone suggestions I’ve made will help you in different scenarios.
If you don’t want to spend anything, the headphone I recommended earlier is all you need. But whatever you do, don’t get those stupid acoustic panels from anywhere.
Streaming
I’ve written an article earlier, don’t know how updated it is:
A professional streaming setup is different from streaming games or whatever. In this case, I recommend something like a Blackmagic Design Streaming Encoder HD (Amazon, B&H) over a gaming streaming hardware like Elgato.
Each item here is from decades of fiddling around with all kinds of gear and accessories. A tidy, ergonomic workspace frees your mind for storytelling, making every cut cleaner and every grade richer.
But really, it makes working fun, and is a place you’d be proud to invite clients to.