In this lesson we’ll learn how to expose S-Log2 in UHD using the Atomos Shogun. It was made with the a7S but the same applies to the a7R II and a7S II.
The test is similar to what I used to explain the Picture profile modes, and I’ll be using a DSC Labs OneShot as reference. The lighting is pure halogen, custom white balanced at 2900K. The light is from the left that is why there is a small but negligible fall-off (the real world barely has zero fall-off).
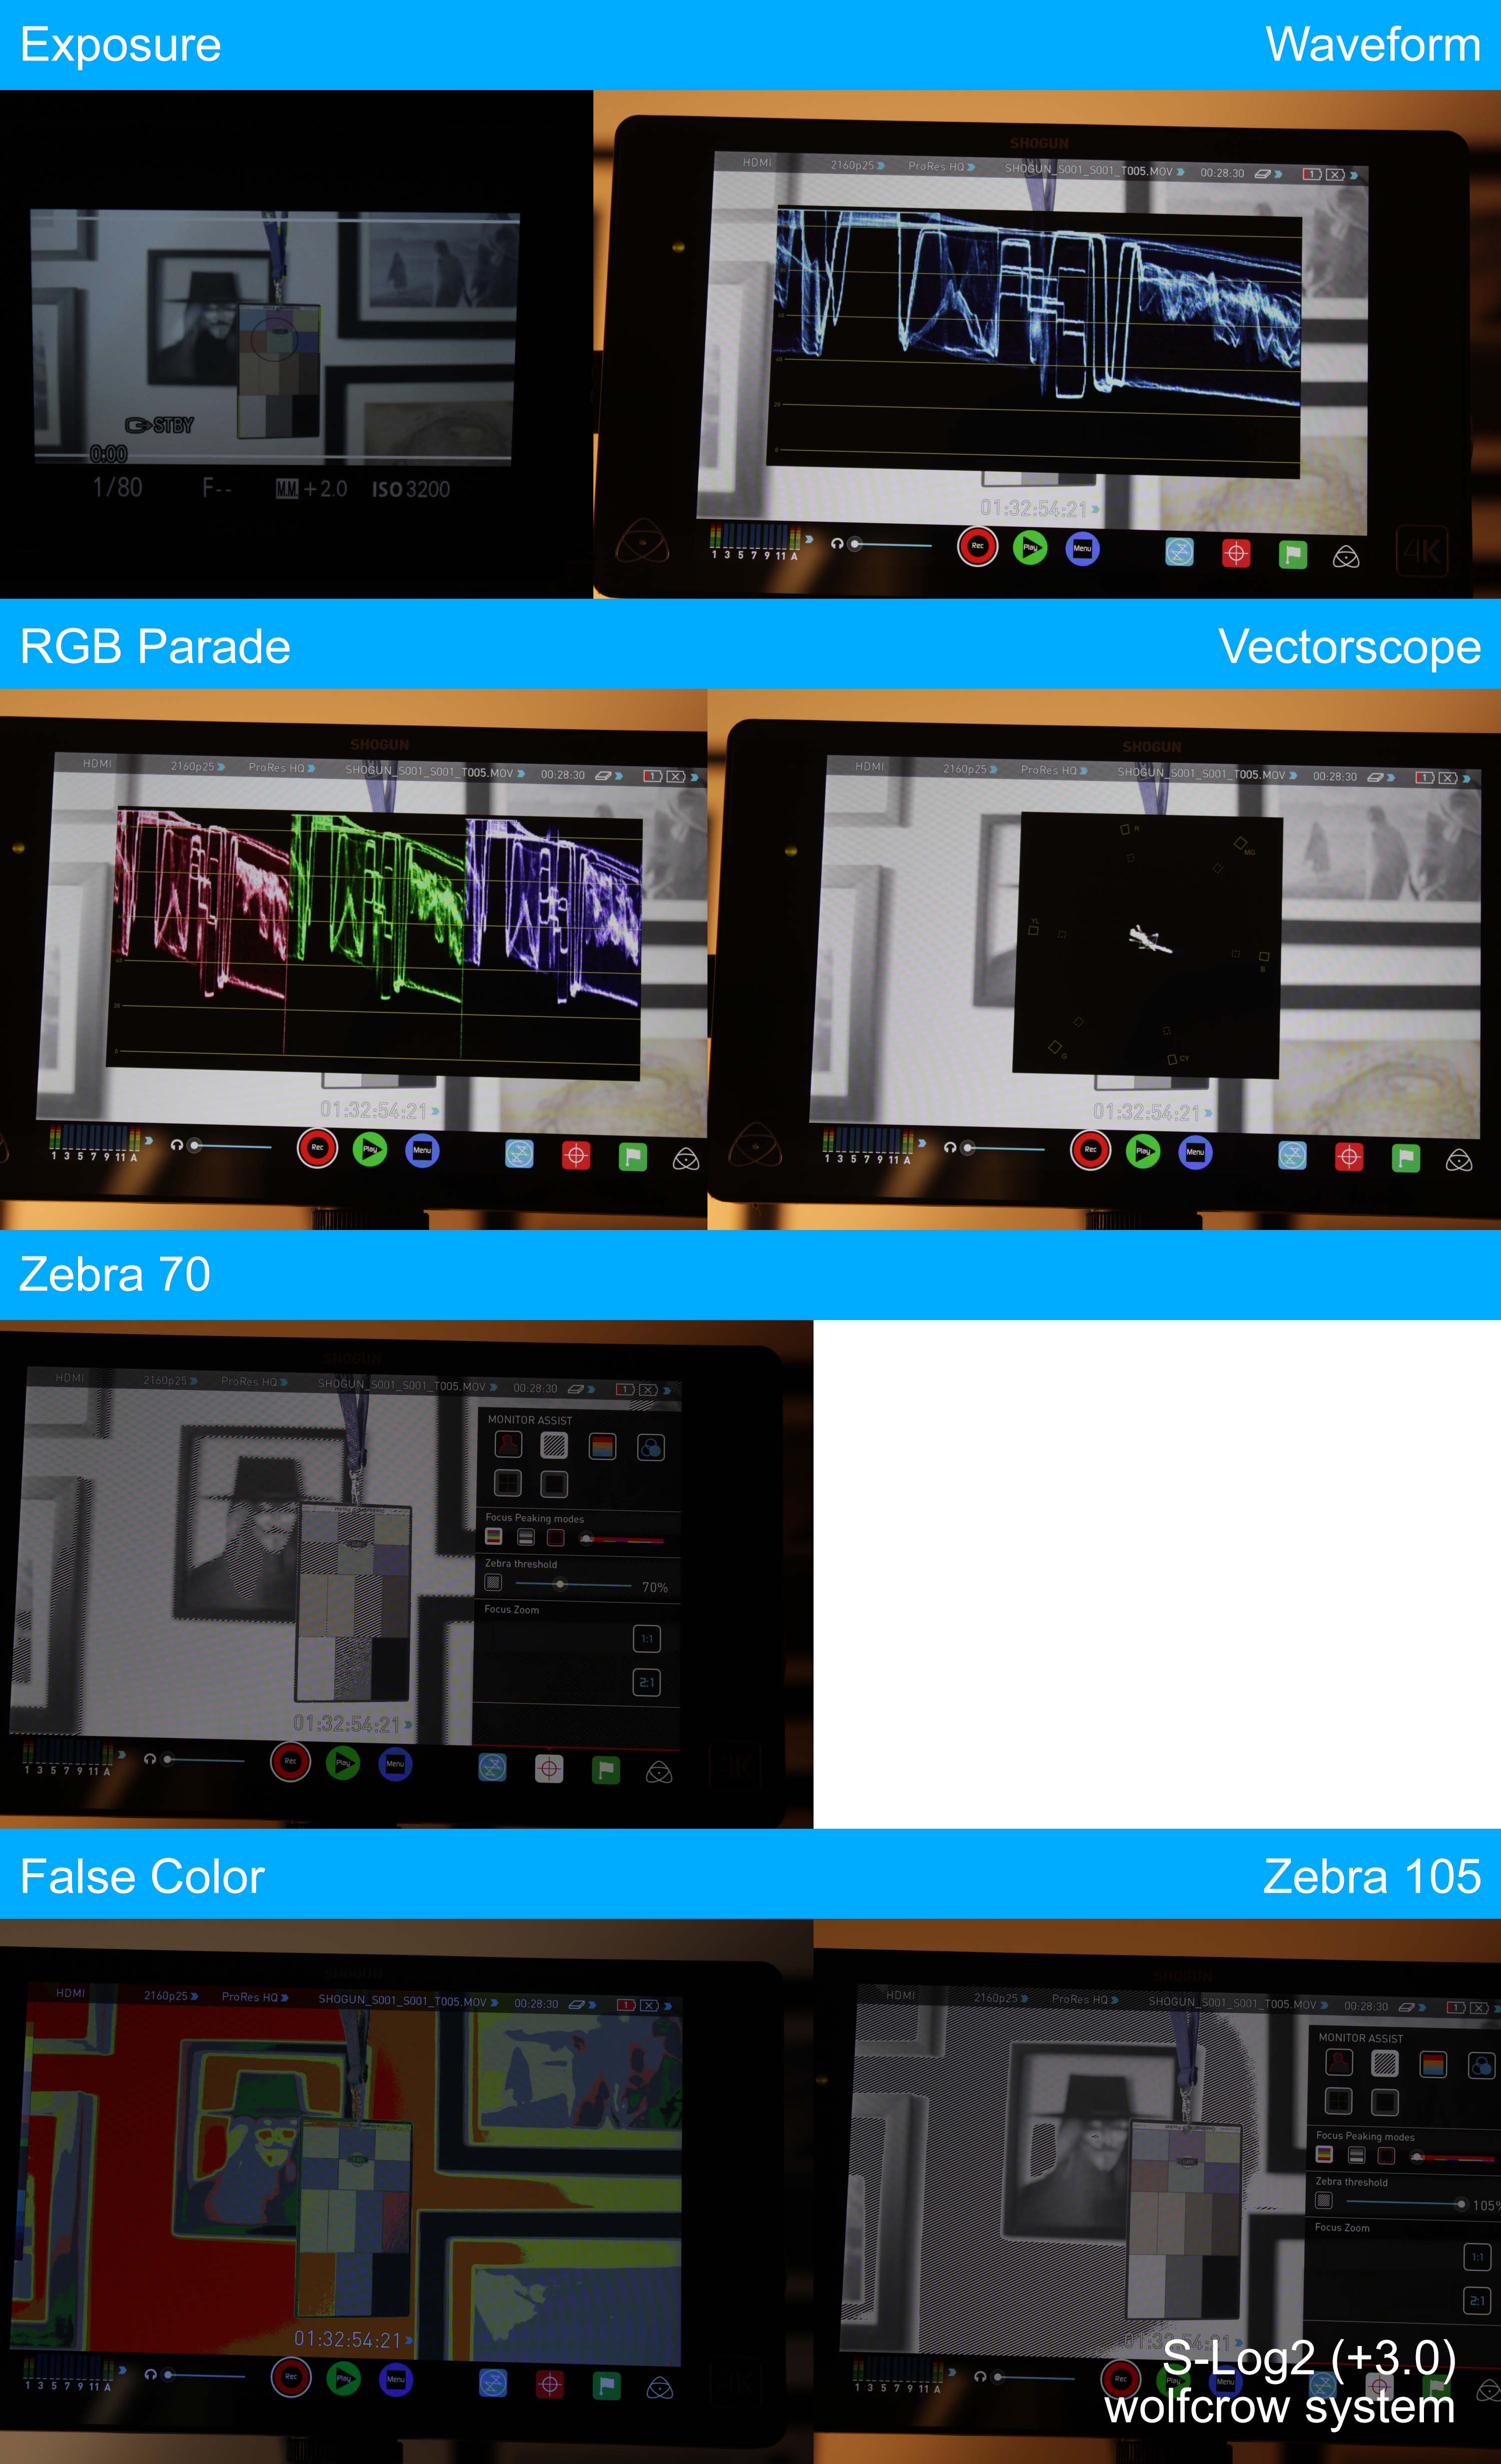
The spot meter in the camera was measured within the large grey patch for exposure. Exposure settings are available in the first image.
Here are the results (click to enlarge):
Notes:
- Look at the waveforms and vectorscope closely. You’ll see that the image in UHD has more ‘busy-ness’ than those found in 1080p S-Log2 (previous lesson – study the two side by side). Does this mean the uncompressed HDMI version has more information? We’ll look at this later in another lesson.
- Everything else is similar to what we’ve seen earlier.
How to expose for S-Log2 UHD using the Atomos Shogun
It’s exactly the same as S-Log2 in 1080p:
- Use the wolfcrow system.
- Keep middle-grey at about 70 IRE and use 105 IRE to check for blown highlights. Use the waveform and/or zebra for this.
- Make sure the RGB parade lines up – this is a quick indicator of white balance issues. Forget the vectorscope.
- If using the false color, middle grey should be at ‘lightest grey’, and really dark skin should not fall below green. Avoid using the false color tool as a reference.