
In this article I’ll explain what a light meter is, the different types of light meters and whether or not you need one for cinematography.
Let’s start at the beginning.

What is a light meter?
A light meter reads (measures) light, and gives you the results in a format that you understand.
Most light meters will give you measurements in terms of:
- f-number
- ISO
- Shutter speed or angle
A good light meter should also tell about light in terms of Luminance or Illuminance. The two most important are:
- footcandles
- lux
Light meters take the guesswork out of judging exposure. You are free to agree or deviate from the results but at least you have a standard starting point.
Let me rephrase that last sentence for emphasis: It’s a mistake to assume the light meter reading is to be followed religiously.
It would be better if you thought of a light meter reading as an extremely accurate weather forecast. If rain is forecast, but you feel like playing football outside, don’t let that stop you.
The two ways to read light
Your camera has one and only way to see light – directly.
But any cinematographer knows that a camera can be tricked when the angle changes.
For example, light bouncing off a metal blade might hardly show up from one angle, but from another, it creates a bright highlight, known as a specular highlight. You can see this with your own eyes, not just through a camera.
As a cinematographer, you have to think of light in two ways. The light source as it directly shines on the set or location, and the reflected light the sensor sees.
The key is to balance the light source(s) based on what the camera sees so that your shots stay consistent. When the lighting matches, your shots will flow together smoothly in the final edit.
In short, there are two ways to read light:
- Direct light (Incident light)
- Reflected light
Why there is only one type of light meter
There are two ways to read light, so you might think there should be two types of light meters, right?
Actually, no.
There is only one type of light meter, the incident light meter. Light meters don’t care where the light has been, just as camera sensors only see light that falls on it.
What matters to the camera is the angle it’s currently pointing at. When the angle changes, the new angle is all that matters.
So, if a cinematographer wants to measure light, he or she can do it one of two ways:
- He or she can move around to measure light in different places.
- He or she can stay behind the camera and measure the light hitting the camera’s sensor.
Let’s explore the first method.
The Incident Light Meter
An incident light meter reads light falling on it.
A typical incident light meter is one a cinematographer or gaffer holds in his or her hand. They walk around the set or location pointing it wherever they want.
To measure light, the light meter has one of these sensors:
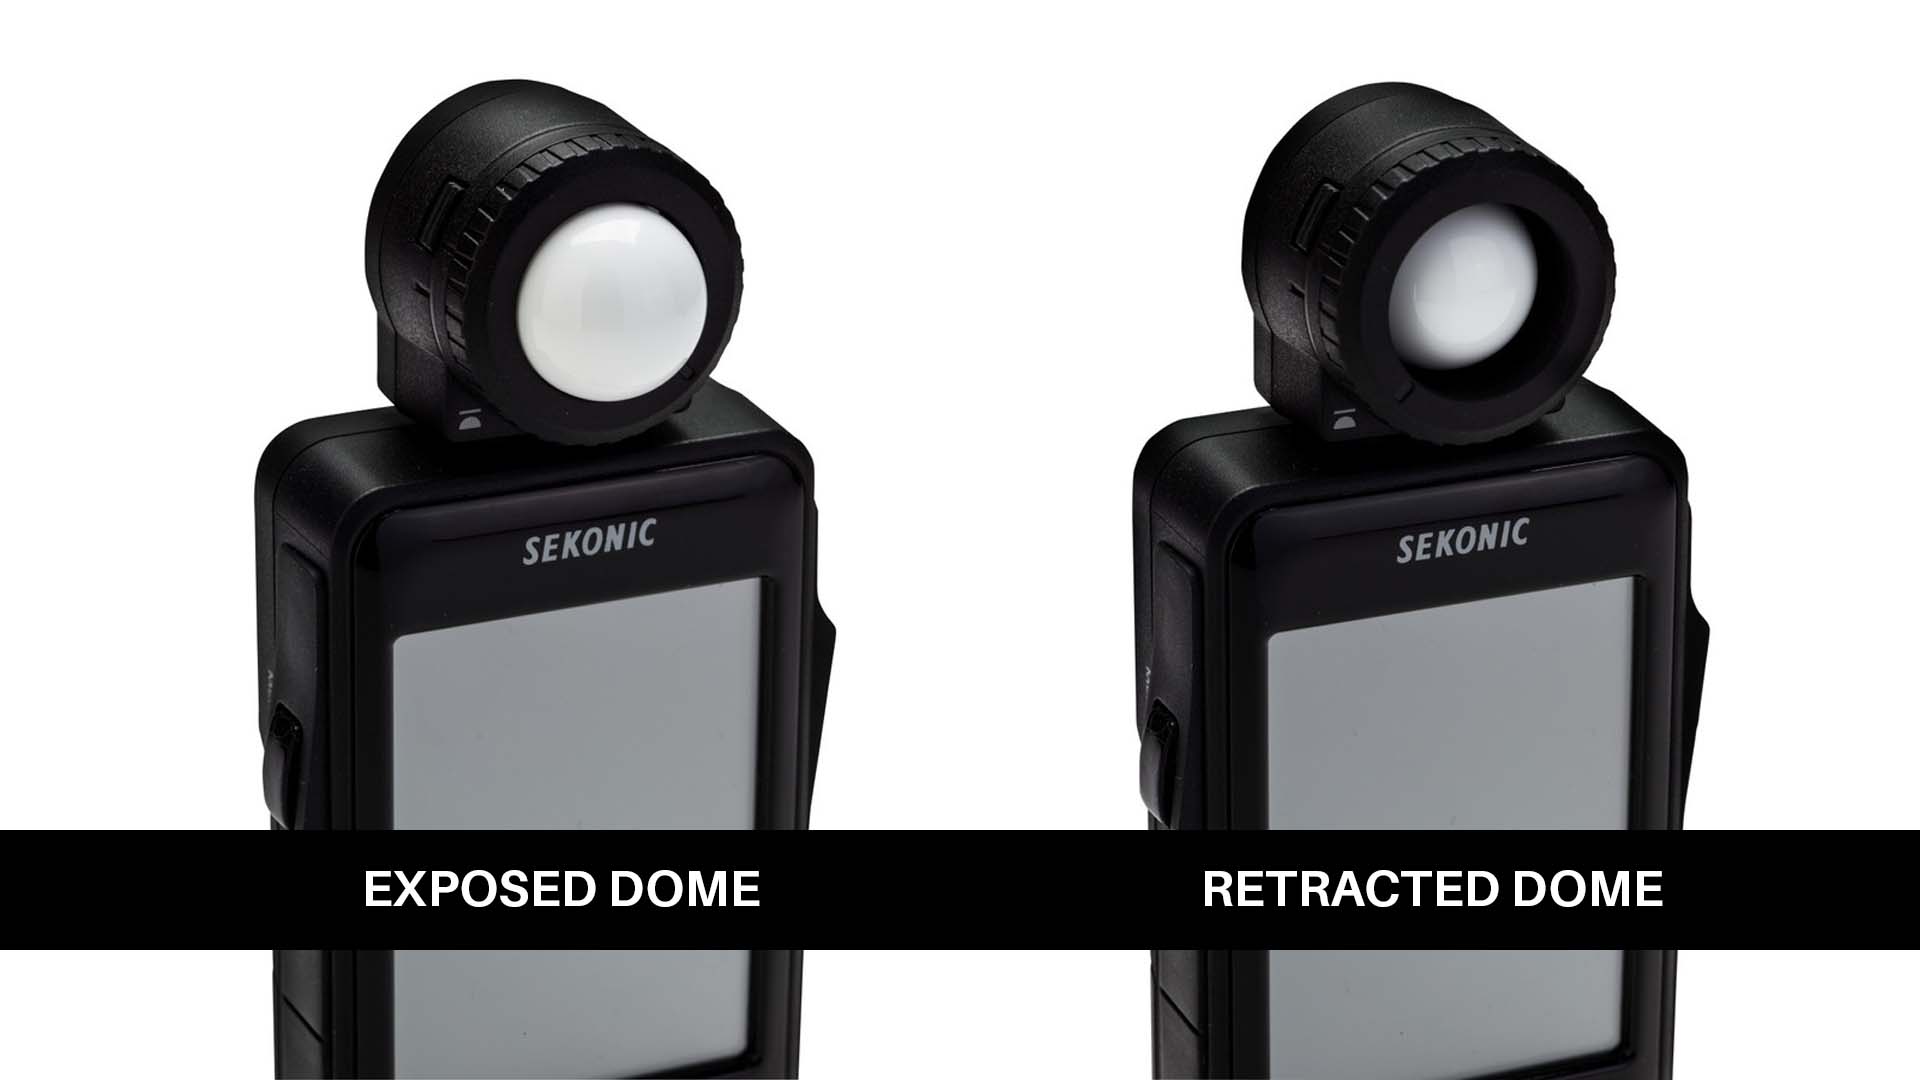
The dome, made of a shiny white surface (it shouldn’t get dirty) can be exposed, or retracted.
When more of the dome is exposed, more light falls on it from all directions. The light it measures is more of an average of light falling from these directions.
When the dome is retracted, only light from the front can hit the retracted dome.
Why do we need two positions? Here are three ways cinematographers and gaffers use light meters:
- Exposed dome – Full. They hold the meter facing the light they are trying to measure, taking care not to block the dome in any way.
- Exposed dome – Partial. They do the same as above, but this time they use their hand to block light from any direction they don’t want measured.
- Retracted dome – Usually used to measure light falling on a wall or flat surface.
Use this rule of thumb:
If you want to measure light falling on a face (or any 3D object), use the dome. If you want to measure light falling on a flat surface, use the retracted dome.
To learn how to measure light with a light meter, watch this video:
How do you measure light on surfaces you can’t reach?
What if the cinematographer wants to measure light on the ceiling, or the sky, or some place they can’t reach with their hands?
If they point the dome it will just take in too much light. The distance is too great and you won’t get an accurate reading of just the area you want.
To get a closer reading, you can attach a lens to the front of a sensor. The lenses are measured in degrees, and there are two standard sizes:
- 1o
- 5o
These are called spot meters.
1o is a tighter circle, and is what you should get. I’ve found in practice the 5o spot meter is not really that useful. It’s better than nothing, but not by a whole lot.
E.g., at a distance of 10 feet, 1 degree spot is a circle with a diameter of 2 inches. At 100 feet, the circle has a diameter of almost 2 feet. For a 5 degree spot, the equivalent values are 8 inches and 9 feet!
In typical usage, even though both types of light meters are incident light meters, we differentiate the names in this way:
- Incident light meter – reads light falling on it.
- Spot meter – reads a reflected value of light
You can’t use a spot meter as an incident meter, or you don’t want to for any practical reason in cinematography.
However, you can use just a spot meter, if you only care about the result of light bouncing off objects. In this case, you will stand behind the camera and measure light from the same direction as where the lens points to.
When to use an incident light meter and when to use a spot meter
Let’s say you have two or three lights lighting a close up of an actor.
To measure incident light at one side, you can hover around the actor and take a reading. Then you move to the other side and take a reading. This will give you the contrast ratio between the lit side and the shadow side.
If you’re filming the same actor from far away, let’s say on a sunny day exterior location with no lights, the incident light meter is just dead weight.
Now you use the spot meter to take a reading of the actor’s face.
However, depending on how far you are, even a 1o spot meter might not be enough to get readings on both sides of the face.
Similarly, if you want to measure the light reflected off the sky or a wall, from the camera’s position, you can use a spot meter.
Where an incident meter shines though, is when you can actually walk around the set or location to measure the light levels in different places. This allows you to know what your lighting is achieving.
Wait, doesn’t the camera have a built-in meters?
Yes, most cameras have built-in meters or exposure tools. You know exactly what the sensor is seeing.
First, let’s talk about the meters inside a mirrorless camera. It has an averaging system depending on the area you are measuring.
The ‘averaging’ system can be divided into three groups:
- Complex algorithm for the entire scene (big secret sauce stuff).
- Center-weighted (Only looks at the center portion of the image).
- Spot meter.
For cinematography, you never use the complex algorithms because you can’t get perfectly matched shots this way.
The same holds true for the center-weighted meter.
The only meter there is some use for is the spot meter. Even so, you have to point the spot by panning or tilting the camera, because the spot is in the dead center of the frame.
This is why cinema cameras have totally different tools for exposure:
- Zebras
- False Color
- Waveform
- Vectorscope
- Histogram
It’s not enough to judge the exposure, the image must conform to a predetermined standard, usually Rec. 709, DCI P3 or HDR.
These tools allow you to ensure your image conforms to these standards. And, they are exactly what you want to match shots in the same scene.
To know more about these tools, watch this:
What do we gather from this? The spot meter might be useful, but not as a replacement for better exposure tools in the camera itself.

Do you need an incident light meter for cinematography?
Those who are in the videography field probably only need the tools already built-in to their camera.
In this day and age, you only need a light meter for film lighting. Let’s look at two practical scenarios in filmmaking.
Scenario 1
You use an incident light meter to check how light falls on different parts of the scene. With some creativity, you’ll figure out where you want your shades of gray to appear. At first, you might make a few mistakes, but your camera’s LCD screen or an external monitor will help you avoid major errors.
You’ll adjust the lighting with your gaffer until it looks just right. Over time, you’ll become so skilled that, even without relying on a monitor, you’ll be able to step onto any set and bring your vision to life using just your light meter.
The camera’s built-in exposure tools will still guide you, but you won’t rely on it as much.
No matter how technology changes, you’ll be ready.
Scenario 2
You rely mainly on your camera’s built-in tools and external monitor. When setting up a scene, you constantly check the monitor because you don’t yet have a clear sense of the light levels in your head.
As you adjust the lights with your gaffer, you get closer to what you want, but the process takes longer. Over time, you’ll develop your own way of seeing light and will be able to create a look based on what you’ve learned.
However, after years of this approach, you might still feel like you can’t confidently step onto a set and light a scene without constantly checking the monitor.
Anyone can look at a screen and adjust, but it’s harder to light a scene exactly as you imagined without relying on it. Without your external monitor, you’d feel stuck. This is especially true if camera technologies change.
Both scenarios are practical. It’s up to you to decide what your path is.
Neither approach is better or worse. In the first scenario, you depend on a light meter and a monitor, and in the other, you rely on just an external monitor. It’s all about how you prefer to work.
A cinematographer used to working with just a light meter can still manage without a monitor. But, take away the monitor from someone who’s never used a light meter, and they might struggle.
In my opinion and experience, you need to learn to use both, and then find your own groove.
So, do you need a light meter for cinematography?
Yes, definitely.
Which light meters should you buy?
Many older analog meters still work, but you never know how accurate they are until you’ve tested them. On the whole, I strongly advise against used light meters if you don’t have the means to test them thoroughly.
If possible, you might want to avoid photography-centric light meters too (though they are perfectly usable and if you can’t afford anything else go for it).
The three manufacturers known for video or cinema light meters are:
- Gossen,
- Spectra Cine and
- Sekonic.
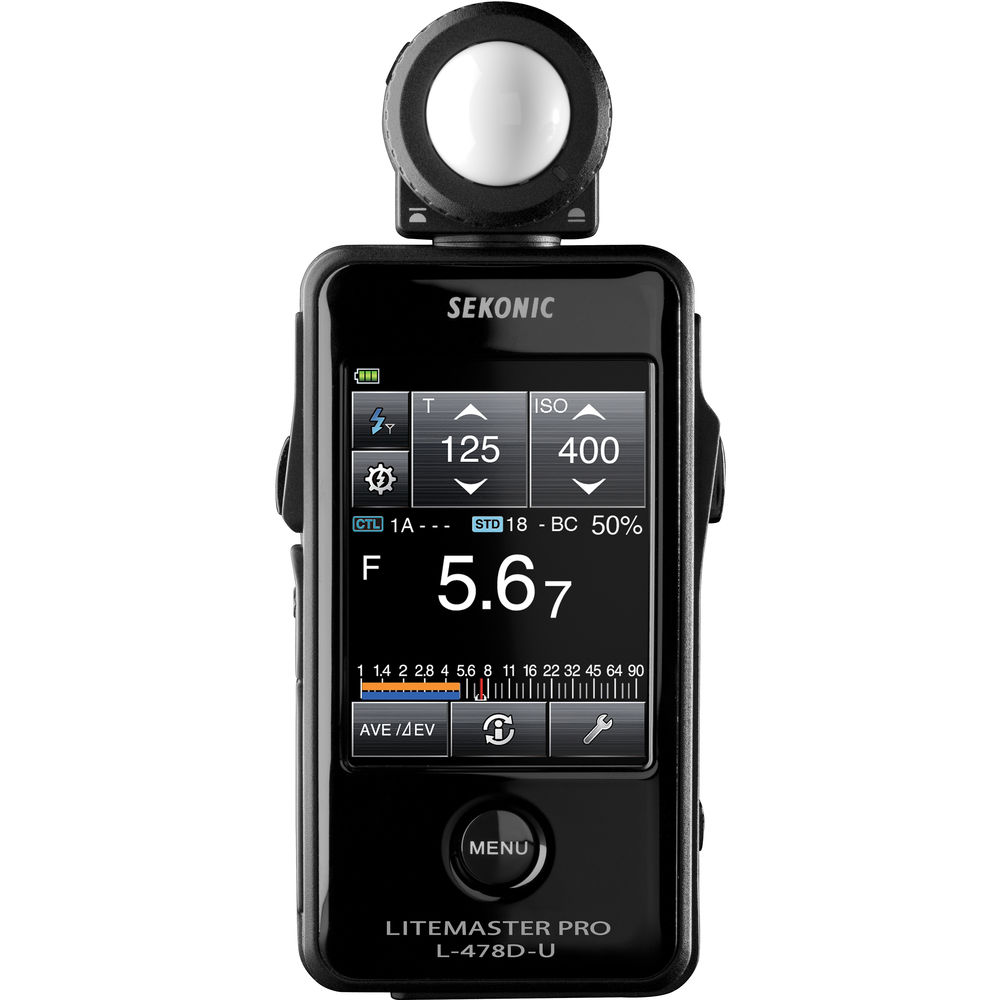
I own a Sekonic 478D because it was the only meter at the time that could take high frame rates and high ISOs, both of which are important with modern cameras. I’ve never found a reason to switch.
When I shot my film, Gin Ke Dus, I used this light meter to measure light levels. I didn’t have an external monitor. I relied on the in-camera zebra levels and the light meter for exposure.
But then again, I’ve been doing this for a long time.
What about mobile phone light meters? I don’t recommend mobile phone attachments. First, you still have to spend on that, and make sure you don’t lose it. Second, you need to carry your mobile phone and keep it charged every day. A light meter can run for a month on a pair of batteries.
Lastly, many film sets don’t allow mobile phones, even in airplane mode. I’ll pass for now. Buy a full fledged light meter.
If I were you, I would buy a Sekonic light meter. Mine’s lasted me a decade.
Here’s what I recommend, depending on your budget:
Good enough for mostly anything: Sekonic LiteMaster Pro L-478D-U (Amazon, B&H):
If you need you spot meter: Sekonic Speedmaster L-858D-U (Amazon, B&H):

The Sekonic 858D-U has a spot meter and is the more useful tool, if you can afford it. There have been cinematographers who only used spot meters for lighting. I don’t think it’s necessary, though.
Two other honorable mentions:
Remember, metering light is about relative measurement. It doesn’t matter if the light is 100 foot candles. What you really want to know is how that relates to other spots in the frame, and how it all fits into the camera’s latitude.
That’s it. I hope you found this useful!
Thanks for the article! Good ration between crazy boring things and entertaining explanations
Great article. The information was articulated well. I also use the 478D for portrait photography. Must have as we’re constantly moving the light sources around.
Thanks!