When you decide to film in 4K you must also be prepared to show the image to a whole lot of people with different priorities:
- Focus pullers
- Gimbal or Steadicam operators
- Crane or Jib operators
- Video villages
- Electronic Viewfinders
- Director’s monitor
- DIT monitors
- Wireless streaming to IPads or mobile devices
You’re only shooting one image, but sometimes different people need to focus on different aspects of the image. The funny thing is, sometimes these priorities clash and can cause friction.
The one fact of life is: You can’t compromise on anyone’s priority because it will impede their ability to do good work.
Therefore, designing a good 4K signal flow will ensure everyone’s happy.
In this article I’ll go over video monitoring strategies and techniques on a typical film set. We will not be looking at recording video, because that is straightforward enough, and not part of this problem anyway.
Let’s start with the simplest setup first.

Low budget one-camera setup
In this setup (one camera, one operator, one focus puller), an EVF or a small on-camera monitor may be enough for framing, focus and exposure. But even here we treat the on-camera monitor as a vital tool: a 5″–7″ display will help judge the focus and composition much better than the tiny built-in screen.
A good on-camera monitor will accept the camera’s true 4K feed (typically via SDI or HDMI) and often supports 10-bit 4:2:2 input and built-in LUTs.
You don’t need a 4K display on a 5″ or 7″ monitor because the added resolution is barely noticeable anyway. You also don’t need super-precise color because the display is too small to notice gradations and image artifacts. But, having a 4K signal input means you’re not complicating things.
In this situation either HDMI or SDI will work. You can tape or pin the HDMI cable to the camera rig to ensure the connectors don’t break or come off. It’s no big deal nowadays.
The next step up from this setup occurs when:
- The director needs a 4K feed, too, and he or she is some distance away (over 3 feet at least).
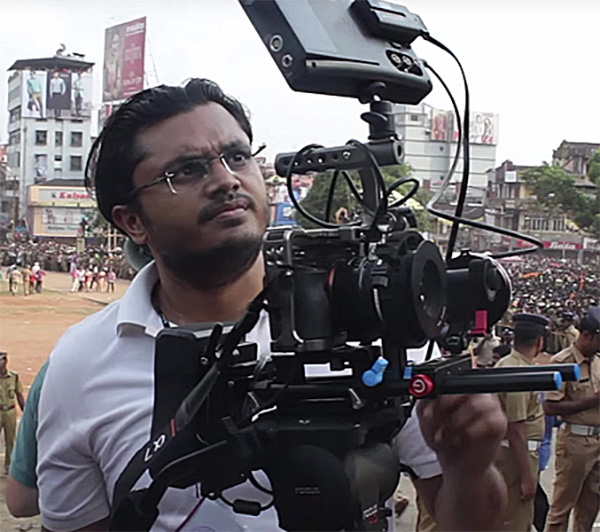
- The focus puller needs to be away from the camera because it’s on a gimbal or jib or whatever.
Now things change a bit.
Directors, Focus Pullers and Single-Camera Shoots
The focus puller must ideally have a dedicated monitor. A 5″ or 7″ monitor is fine for up to 4K work. However, for larger budgets, or if you’re filming in 6K and up, the focus puller will need a larger display for more critical focus.
There is a law of diminishing returns here. If the monitor is too big, moving it for every shot is time-consuming. My typical favorites are 7″ for most work (the focus puller stands close to it) or 24″ for a more critical setup.
What about the director? All they’re typically looking for is framing, mood and the performances. To be honest, it depends on the director.
For decades directors didn’t have any monitors (neither did anybody else). Some directors are happy with 7″ monitors in their hands. Some directors need larger screens and prefer to be in a video village.
Either way, in both cases, you’re talking about getting a low-latency signal quite a distance away. The low latency part is important for these reasons:
- To the focus puller: This should be obvious, but they need to adjust focus on the fly, no matter how far the camera.
- To the director: They will be hearing the actor with their ears (even with headphones on, because they’re typically open-back) and having a delayed image will throw them off. If the director is tucked away in a video village then a small delay doesn’t affect work that much.
If you’re doing this manually, using a cable, SDI is the only way to go. HDMI goes out the window. This is why every serious cinema camera has SDI.
What if you’re stuck with a camera that only has an HDMI output?
If you’re stuck with a camera with only HDMI, then you’ll need a convertor (which I don’t recommend), or an EVF/On-camera monitor that can take HDMI and then do the conversion to SDI via what is called a “loop-through”.
A loop-through means the 4K signal is passed along without modifications. Sometimes you can modify it a bit, especially by adding LUTs to give it a different look, and that can be useful.
What if your camera or loop-through has only one SDI out?
You need to feed both the focus puller and the director, and they might be standing in two different places.
On a low budget film, the director should be willing to stand next to the focus puller and both can be happy.
But let’s say that’s not possible.
If you’re doing it manually, you’ll need a splitter or convertor, like the Blackmagic Design Mini Converter (on Amazon):
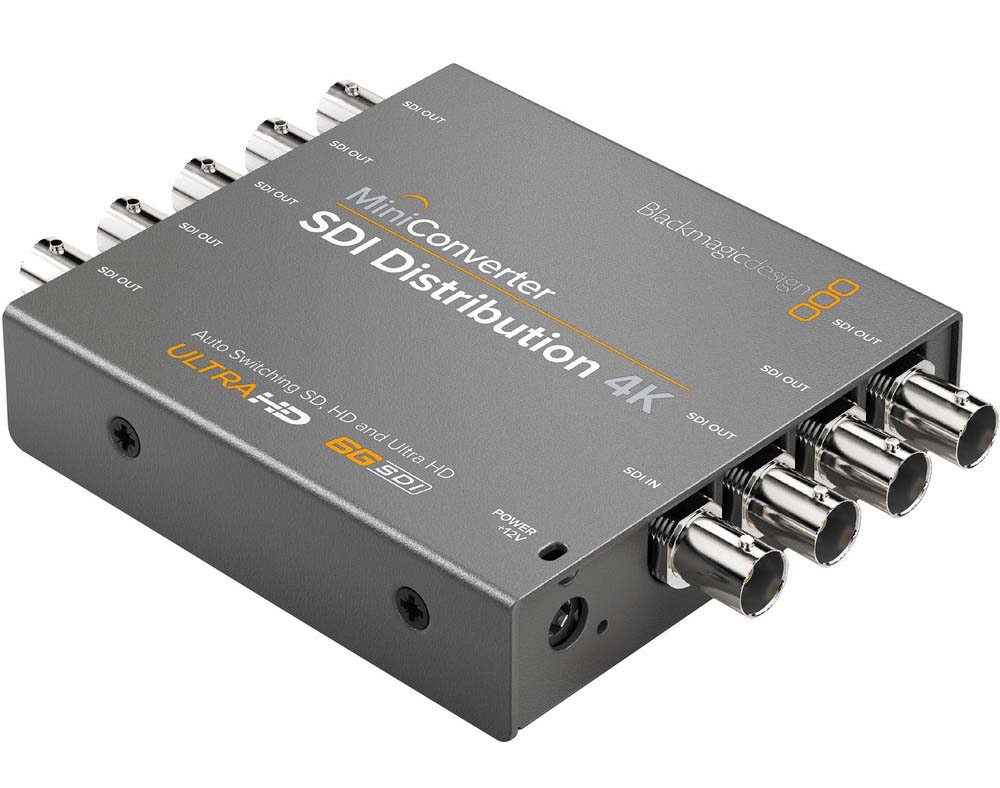
As you can see, this device effectively solves the problem for about 12 monitors!
There are some caveats you need to be aware of in a typical convertor like this:
- Make sure it accepts 4K up to 60fps or 4K up to 30fps as the case may be.
- Make sure it supports both 4:2:2 and 4:4:4.
- Make sure it passes through audio as well.
- Make sure you have access to power, because it does require a power supply.
- You need to understand a cheap adapter like this only outputs the same signal to all outputs. You can’t change the resolution, color, etc. for individual outputs.
To be honest, I would not go for this setup unless I was really cash-strapped. A more reliable and versatile option is the Blackmagic Teranex AV (Amazon, B&H):
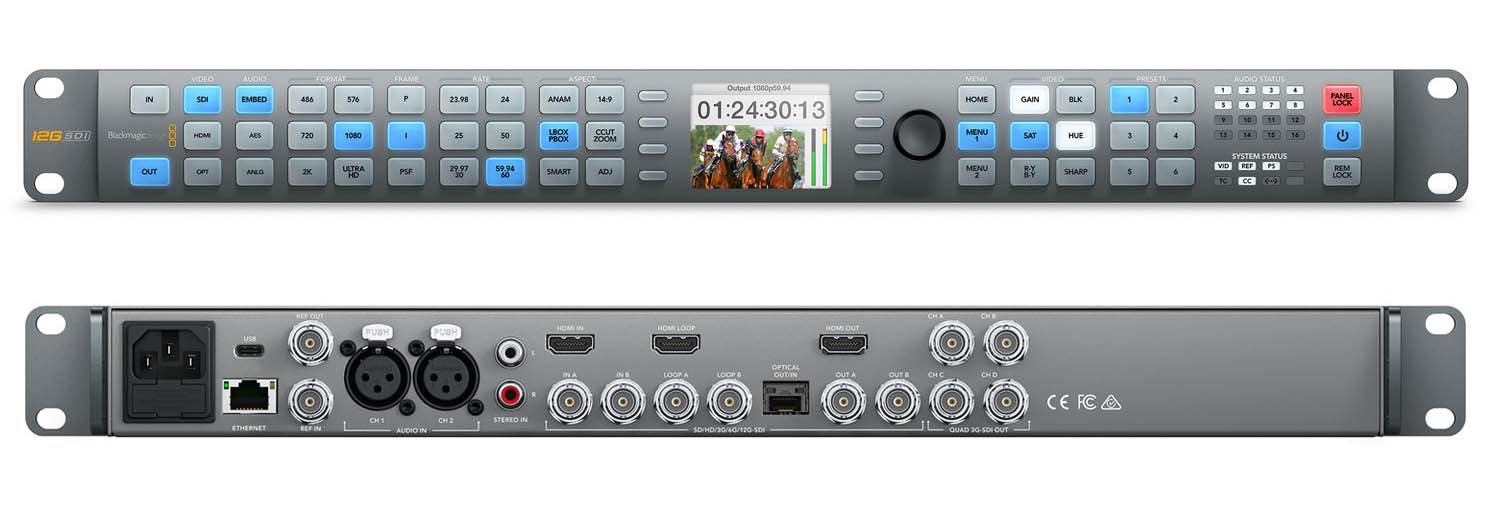
Here’s what you get:
- Latency of approximately two frames.
- Up to 12G-SDI supported and is HDMI v2.0 compliant. This means you can pass the video to a computer display as well.
- Can downconvert or cross convert between resolutions.
- Embedded audio + audio via XLR and stereo inputs.
- Control via the front panel buttons and menu navigation, or through Ethernet.
Obviously something as big as this needs adequate power and needs a cart for correct installation. This assumes there’s a DIT on set as well with the requisite skills to manage all this.
The downside of using converters is all the cables that need to be laid out and routed. If the camera needs to move around, as on a gimbal, you won’t get an SDI out anyway.
That is why the typical film set has shifted to wireless video. It makes things easier in some aspects, harder in others.
Wireless video transmission
To get wireless, you’ll need a transmitter and a receiver. The transmitter sits on the camera, connected to SDI or HDMI. The receiver will receive the signal and convert it back to SDI or HDMI.
Then you can run cables to whatever. To know more about wireless transmission, read this:
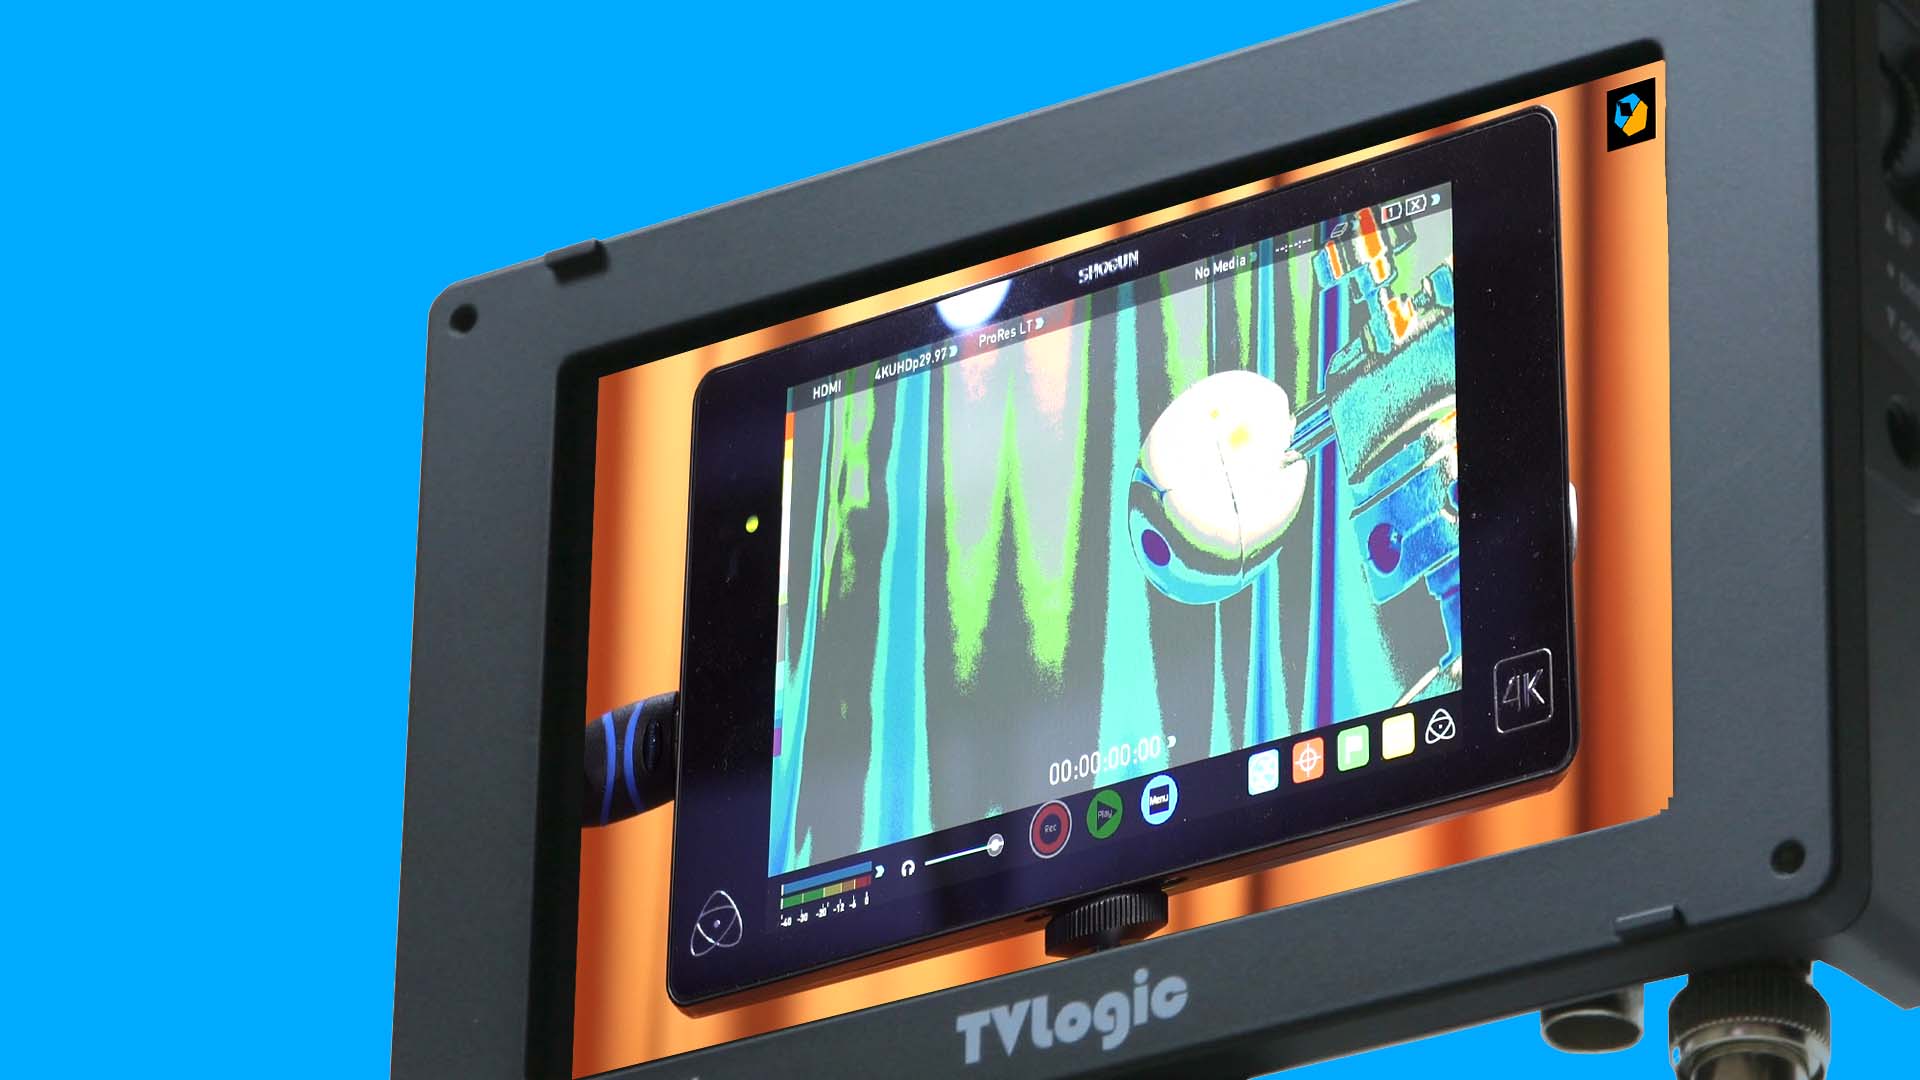
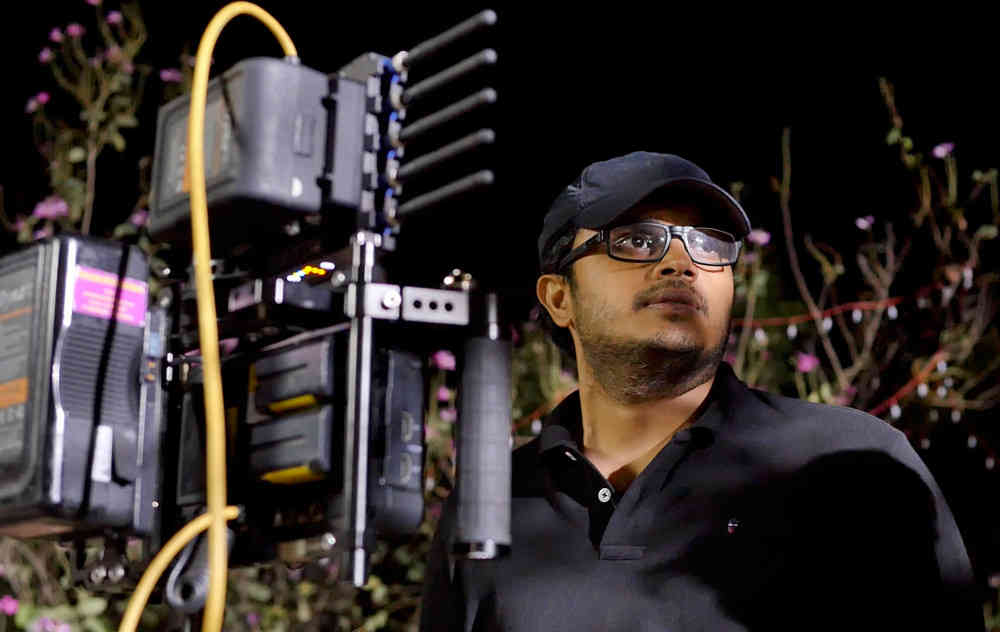
In the image above I’m standing in front of the director’s monitor – an Atomos Shogun 7″ monitor. But look at all the added accessories it needs to connect to!
There’s the Hollyland receiver and both need batteries. The entire thing is mounted on a light stand with sand bags so the damn thing won’t fall down in a breeze.
Other than all the extra power and setup required, the biggest disadvantages of wireless are:
- Latency: though with good systems this is not an issue anymore.
- Interference and signal loss: It happens in some environments or cheaper gear. You get what you pay for. So don’t compromise, and test thoroughly. Low budget films don’t do either – so be prepared to get frustrated.
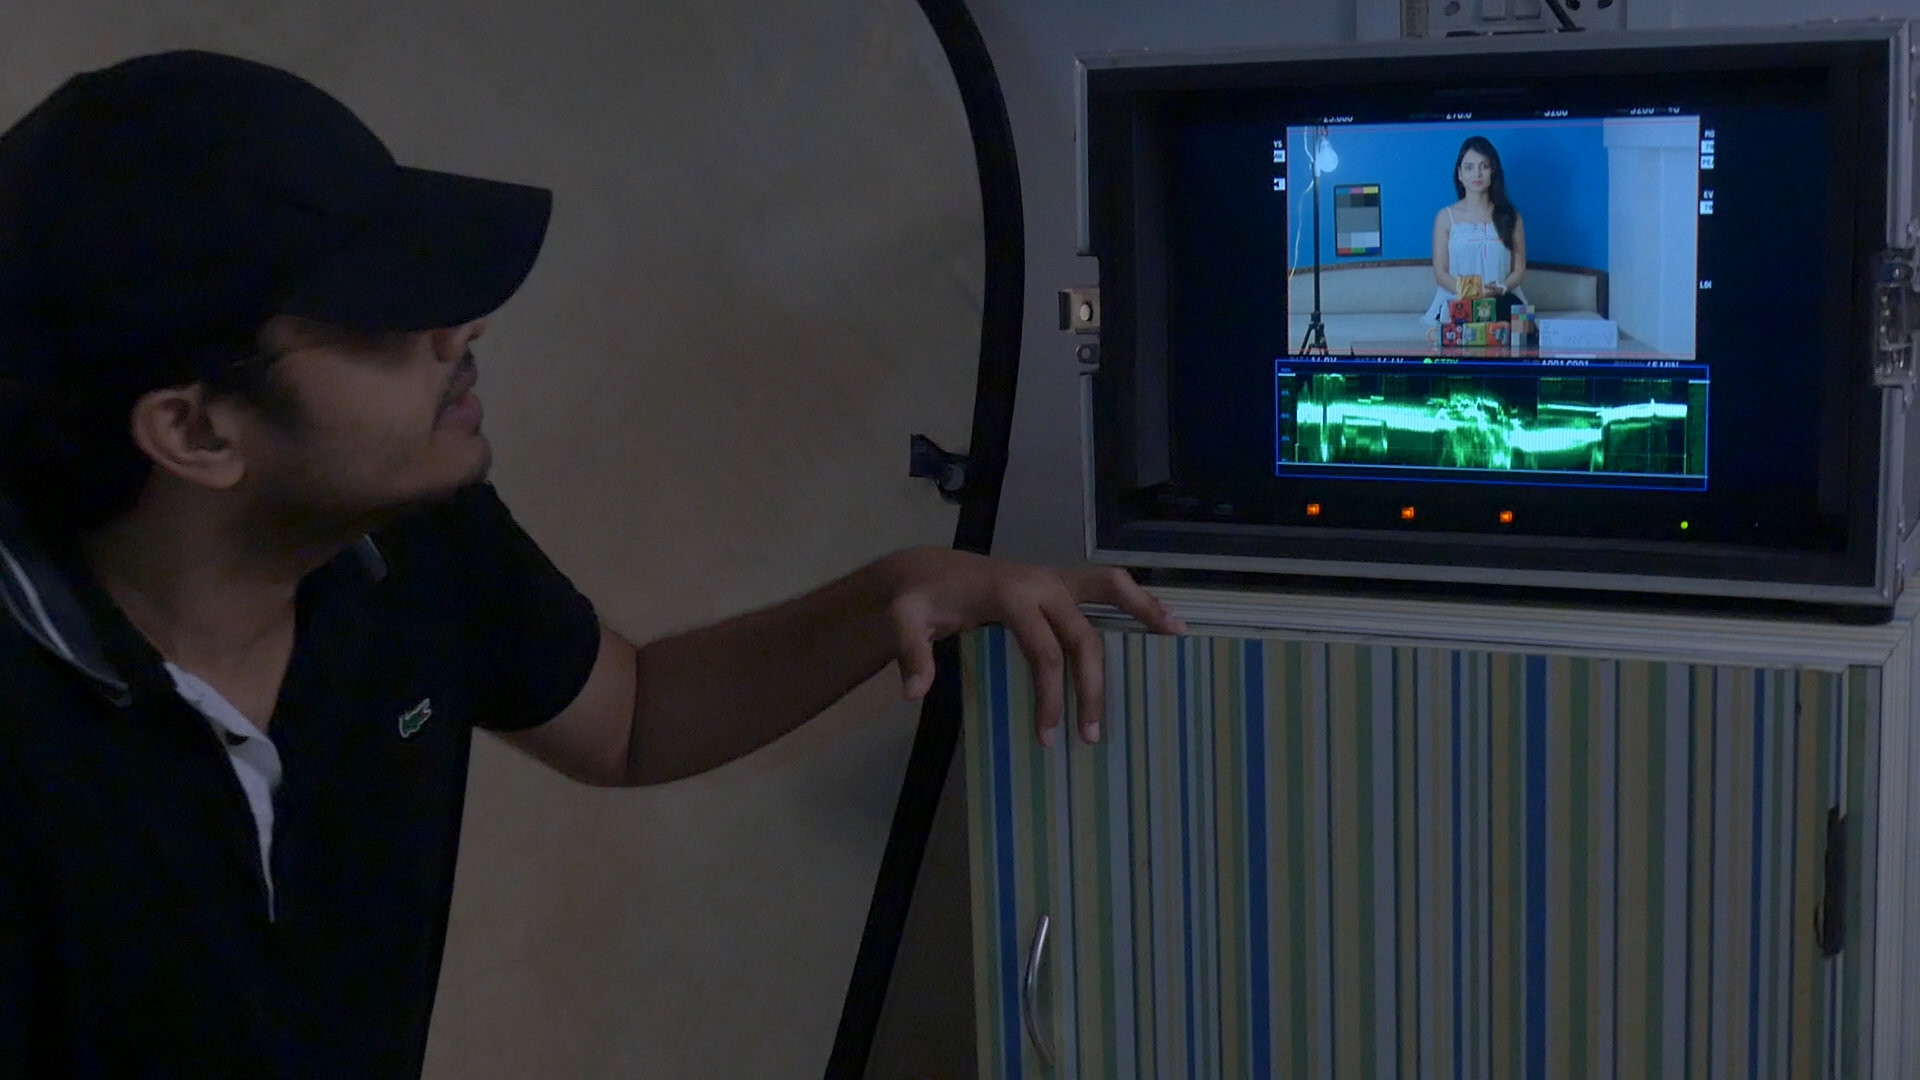
Video Village and DIT Monitors
As we scale up to larger crews, we add a “video village” – a viewing area (often shaded tent) with one or more big monitors for the DP, director, script supervisor, producers, etc.
These monitors are usually 17″–32″ (or larger) and live on a cart or stands. Their sole job is to show exactly what the camera sees (often with a LUT).
The Video Village and DIT monitors have some critical needs the earlier monitors don’t need to have:
- They have to be color critical.
- They have to render motion precisely as it is being recorded. No added jitters, ghosting or whatever. Computer displays are terrible at this, which is why they are not used.
- No added vignetting to the image.
- They need to be able to load LUTs – especially custom LUTs.
What you’re looking for, is called a broadcast monitor. The only two brands I would even seriously consider is Sony and Flanders Scientific (FSI).
In a video village, run the camera output (or multiple cameras) to those big screens. Typically the camera’s 4K SDI output goes into a 12G-SDI distribution amplifier or router or converter at the DIT cart.
On bigger shoots with multiple cameras, a signal router lets each monitor pick which camera to view. If you have only one camera, you can simply daisy-chain monitors (each SDI out to next) or use an SDI splitter box.
Label each cable at both ends with the camera number or monitor it goes to – it saves confusion on a multi-cam set.
When planning the village, also think about ergonomics. Monitor stands or carts should be stable and height-appropriate. Keep direct sun off the screens, and cover cables to prevent trips.
You need enough screens for the DP and director (and DIT if present), plus any client or producer who needs to watch. You might also stream a lower-res video feed to tablets for producers or remote attendees – that’s common now, but remember those have more latency, so don’t rely on them for critical focus or timing.
What about LUTs?
Thankfully, modern monitors – both on-camera and broadcast monitors – come with the ability to load custom LUTs. So the process is pretty simple.
You just load the LUTs you need to each monitor and use that. This is assuming the feed you are passing from the camera is a log-encoded feed without any LUT applied.
My suggestion: Let each monitor have its own LUT. Most of them just need the manufacturer-provided Log to 709 or Log to HDR-flavor LUT. You could use custom LUTs for the director, producer/client, DIT and cinematographer.
The responsibility of LUTs fall on the DIT, which makes sense. The entire signal pipeline can be controlled via the DIT cart. It can be the hub, if it’s not in the video village.
What color space should I monitor in?
Monitor in the color space for delivery.
If it’s an HDR show, monitor in that format (Dolby Vision, HLG or HDR10, whatever). If it’s a theatrical release, monitor in DCI P3.
In all cases an additional Rec. 709 view is critical, because eventually everything winds up on Rec. 709 one way or the other!
8-bit or 10-bit?
Simple. For the video village and DIT cart 10-bit is critical. For everybody else 8-bit or FRC is good enough.
4:2:2 or 4:4:4?
Really simple. 4:2:2 is good enough for everyone on a film set. For anything including viewing custom LUTs.
The creation of LUTs should happen in a 4:4:4 environment, but on viewing nobody can tell the difference.
How bright should the individual monitors be?
They should follow the standard for that format. For Rec. 709, the final delivery is 100 nits. If you’re viewing the feed for color critical evaluation, then the monitor should match Rec. 709 standards.
However, for focus pullers or other field-use monitors, it doesn’t matter.
The same applies to HDR – monitor in the brightness expected in the delivery specifications. Don’t be stupid and monitor everything at 1000 nits just because your monitor can do that!
When in doubt, the DP or cinematographer can go through the monitors to ensure they are set at the correct exposure levels – but the technical manipulations and troubleshooting can fall on the camera team or DIT.
What if I’m shooting RAW?
It makes no difference. Today, on a film set, you’re using a log-encoded workflow (unless you’re an idiot). If you don’t know the difference between RAW and Log, watch this:
Best Practices and Communication
A few golden rules:
- Consistent Image – All monitors should ideally accept the same video signal. This keeps it simple. The only change that needs to be made is the use of LUTs for individual priorities.
- Crew Access – Decide who really needs a monitor. You need to keep cameras on action clear so there is enough space to get things done.
- Power – Have plenty of charged batteries or AC power for all monitors and transmitters.
- Cables – Use thick-gauge professional grade SDI cables (12G-SDI for 4K60p) and adapters. Tape the cables to stands or the floor to prevent snags. Label both ends of every cable. Put a “Do Not Touch” label on critical monitor cables and ports – it helps keep curious minds from accidentally unplugging or switching outputs.
- Testing – Before shooting, run a quick test of the entire signal chain. Check the image on each monitor, scope readouts, LUT appearance, and latency. Make sure focus peaking and other tools are working. Calibrate your village monitors if possible. If there’s a DIT on set, they should confirm the signal chain’s integrity; if not, the camera team should handle it.

Quick Checklist
- Camera Output: Check if camera’s 4K output is SDI or HDMI, single-link or dual-link. Plan cables accordingly (3G/6G/12G SDI, HDMI 2.0, or converter).
- Monitors: Use 10-bit-capable monitors if possible. Decide which monitors run on SDI vs HDMI. Ensure supports built-in LUTs or an external LUT box. Match all monitor color settings.
- Signal Distribution: If one camera to multiple monitors, use a quality splitter or distribution amplifier. For multi-cam, use a router/matrix. Don’t daisy-chain too many devices without amplification. This part is beyond the scope of this beginner-level article – and I haven’t worked on a production of this magnitude because these are usually non-fiction-based workflows.
- Cabling: Use professional SDI cables (BNC) for reliability. Keep cable runs within spec.
- Power: Double-check that monitors, transmitters and recorders have enough batteries or AC, and spares are on hand.
- LUT/Application: Confirm what the DP wants to see. Load the appropriate LUTs into all monitors and LUT boxes. If shooting log, switch monitors out of “LOG” mode to see the graded image, or load the appropriate LUTs. For color space transforms, use the official LUTs provided by the manufacturers of the camera.
- Ergonomics: Place video village monitors where the DP and director can see without straining. Provide chairs or tall stools if needed.
- Communication: Brief the team. Who looks at the monitors? Let actors know the director’s at the video village, or whatever.
By planning your signal paths and monitors thoughtfully you ensure everyone sees the 4K image they want. The DP gets a reliable view of framing and color, the focus puller gets a crisp, lag-free feed, and the video village keeps the whole crew in sync.
Keep things simple, and you’ll be okay.
Any thoughts on the Lilliput 15′ 4K monitor? Seems like its a good cross between 7′ and 31′.
But is it?
Haven’t tried it. A 15″ monitor is an odd size, maybe useful for jib/crane operators, etc., but otherwise that size is more limiting than a 7″ or a 21″.
Thanks for your inputs, they are very valuable to me.
You’re welcome!
Hi Sareesh,
Thanks a lot with this amazing and post with great recommendations. It helps a lot to think about extra gear.
“The difference in size is not much, so do not opt for 5” you wrote.
“A player-recorder consumes a lot of energy refreshed by a fan. And a 7 “even more than a 5”. In the context of energy self-dispatch without recourse to the sector, the question of energy autonomy is a question of digital life or death. If I can ship an inverter generator and a hundred liters of gasoline Super 92 as in July 2018 in Urals Polar (Iamal, Russia), the question would not arise. Next summer, I go to Siberian Arctic tundra (also Iamal) to stay amongst Nenets reindeer herders during four full weeks. I will take GH5, GH4R, LX100, Mavic Pro 2 and DJI Smart Controller.
Shinobi is also very readable in full sun thanks to a slab of 1000 nits well superior to an iPhone XS Max (660 nits).
Finally, at last but not least, the battery of the Shinobi has kept its promise: with the screen turned on, I shot from 9:30 to 18:00 and it still had a little battery, which is quickly recharged only in 30 minutes.
That’s very good for me for the price and the confort to shoot.
Best regards,
Michel from France
You’re welcome!