
Film lighting can be scary, but I’m here to make it easy for you.
I’ve filmed with no lights, one light, two lights and any combination of lights. I’ve used tungsten, fluorescent, HMIs and LED lights in my career.
What have I learned?
First off, there’s no perfect lighting kit. What works today might not be useful tomorrow. You’ll always need more lights, or different lights, or a different modifier.
Each film you make will change what you think your kit should include. However, you need to start somewhere. My mission with this article is to help you put together a low budget lighting kit for narrative films.
So, let’s take it step by step and get started!


What does it take to put together a good lighting kit?
A good lighting kit must be versatile.
Narrative films have multiple scenes in different locations. Then there’s the day-or-night factor. A lighting kit that works for one or just a few setups isn’t going to get you far. In fact, it will be frustrating because you’ll try to force whatever you have to every situation.
So, we have to approach this problem from three angles. The results of this exercise will tell us what a versatile kit looks like. In the final step, we can look at budgets (because that’s the bottom line, isn’t it?) to find the right kit for us.
Here are the five stages of this process:
- Understanding how much light you’re going to need for narrative work
- Listing what kind of lighting fixtures exist that will give you the quantity of light you need.
- Learning about modifiers and how they can help you make the most of your lighting fixtures.
- Estimating the physical and electrical restrictions of low budget narrative films.
- Filtering out everything with your budget.
Ready? I’m going to have definitive answers by the end of this article. If you don’t have the patience, click here to see my recommendations for a lighting kit.
However, if you’re serious about your cinematography, I don’t recommend skipping anything. Take the time. I assure you it will be rewarding down the line.
How much light do you really need for narrative work?
By how much I mean the intensity of light. In simple terms, the higher the intensity the brighter a light is.
We measure light intensity coming out of a light in lumens. However, rarely do you need to know about lumens. After all, you’re going to modify the light in some way, or place it at a certain distance, and that means how much light the fixture emits is not as relevant as how much light you get at a certain place.
Let me explain. I’ll use the sun as an example:
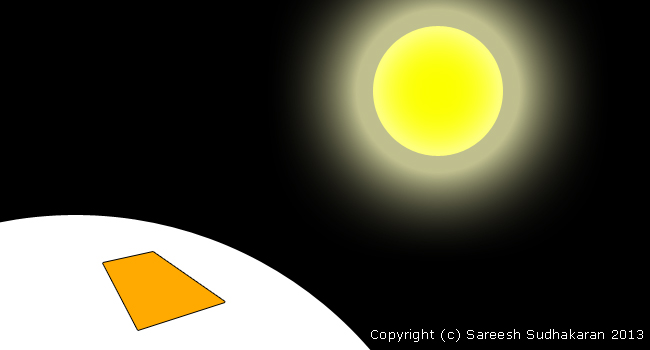
Using the sun as your starting point
The sun throws light in all directions (360o). The orange patch on earth is our ‘party strip’. Obviously, all the light the sun throws out is not landing on the party strip.
The area of the orange patch decides how much light it gets.
The sun delivers about 100,000 lumens per square meter. If our party patch has an area of one square meter, the light intensity is about 100,000 lux.
Lux is a simpler unit that means lumens per square meter. It is more practical for cinematography. In the US, the more common unit is foot candles.
What is lux (or foot candles)?
Lux (or foot candles) is the amount of light falling in a particular area.
1 foot candle = 10.76 lux
If 100,000 lux is what we get on a noon day, that’s about 9,294 foot candles. Or you could just say about 10,000 foot candles. As a rough guide, you won’t be too wrong assuming one foot candle is about 10 lux.
Why is lux more useful than lumens?
If our party patch had an area of 30 x 30 feet (900 sq.ft or about 82 m2), then the lumens falling on it is about 8 million. However, the lux is still lumens per square meter, or 8 million / 82 m2, or 100,000 lux (10,000 foot candles)!
On an average bright noon day, the sun throws out about 100,000 lux.
This is a great starting place. If you want to fight the sun, you need a light or lights that deliver about 100,000 lux on a cloudless noon day.
How many lights does it take to fight the sun?
Let’s say we want to light the same patch with a 100 Watt tungsten bulb that throws out about 1,000 lumens.
For simplicity’s sake we’ll assume all of these lumens are available for our patch, and there’s no light loss at all.
The lumens per m2 (lux) is 1000/82 = 12.2 lux.
So, how many 100W tungsten bulbs do we need to replace the sun? About 8,000. That’s 820 KW of power!
A tungsten bulb has a very low lumens-per-watt rating, at about 10 Lumens per Watt. and technically, it’s color temperature will not match the sun’s. If you add a filter to match the sun’s temperature, you’ll lose even more light. It is, however, cheaper, and has the best color response after the sun!
Let’s say we pick an LED bulb instead, something like this one from Philips, which throws out about 800 lumens drawing 8 Watts. That gives us a 100 lumen per watt rating, ten times that of tungsten!
This LED bulb will give us 800/82 = 9.76 lux.
How many LED bulbs would you need? You need about 10,246 bulbs! That’s more than the number of tungsten bulbs, but it draws only 82 KW of power!
10,246 bulbs aren’t practical. Then what is?
As of this article, HMI bulbs are still the best value for money when you want tremendous amounts of light.

How many 18K HMI lights (at about 85 LPW) does it take to do the same thing? About five at full spot. That’s 90 KW of light.
Side note: When I use the letter “K” after 18, 12, or whatever, I mean KW. 18K is 18 KW, 12K is 12KW and so on. This is common industry lingo. The same doesn’t apply to LEDs or tungsten lamps. Why? I have no idea.
So, it draws roughly the same amount of power as 10,246 8-Watt LED bulbs. An 18K HMI with bulb costs about $58,000. Five of them will cost $290,000!!
10,246 LED bulbs at today’s prices is only $32,000. However, try connecting, transporting, controlling and managing 10,246 bulbs, as opposed to one 18K fixture, and the money lost in time and manpower will outweigh any gains made with the fixture itself.
Moreover, 18K HMIs are a rental item. Let’s just say you’re getting it with stand and bulb for about $1,500. It makes a lot of sense then. You can’t rent 10,000 LED bulbs and cables if you tried. You’d need to buy them.
I’ve barely scratched the surface of the complexities and subtleties involved in this crazy comparison, but it is fundamentally solid.
Now you know why we still need large HMI lights for exterior daylight sets. Hopefully in the future LEDs will become more powerful and HMIs might be phased out of the film industry completely. Even so this will hold true no matter what:
No matter how good a camera ISO becomes, and no matter how many ND filters you use, if you want to match the sun, you need to match the sun in intensity.
This is why over the last century of cinema, cinematographers have always tried to use the sun to their advantage, instead of trying to fight it.
This is the first big takeaway in our article.
There is no place for HMIs in a low budget lighting kit
If you’re shooting on a low budget, you must use the sun to your advantage. There is simply no room for 18K or 12K HMIs, unless, maybe, you can accommodate it for one or two days in a long schedule. That’s doable.
However, in no way shape or form can 18K or 12K HMIs ever be part of a low budget lighting kit. Same applies for Arri M90s, which are 9K lights.
What any smart cinematographer will do is try to work at much lower light levels. One way to do it is to film only during golden hour, where the light intensity (lux) levels of the sun are way lower.
How lower? Let’s find out.
Common light levels and exposure values
Here is a simple and inaccurate (but good enough for our purposes) table that plots exposure alongside f-number and lux levels:
| Situation | Lux level | f-stop at ISO 100 | f-stop at ISO 800 |
|---|---|---|---|
| Bright noon sun | 81,920 | f/22 | n/a |
| Partly cloudy sunny day | 20,480 | f/11 | f/32 |
| Overcast day | 10,240 | f/8 | f/22 |
| Open shade | 10,240 | f/8 | f/22 |
| Golden hour | 10,240 | f/8 | f/22 |
| Studio setting | 1,000 | f/2.8 | f/8 |
| Office with windows | 640 | f/2 | f/5.6 |
| Office with LED/fluorescent lighting | 320 | f/1.4 | f/4 |
| Night street light | 320 | f/1.4 | f/4 |
| Low light spaces, workshops, etc. | 160 | f/1 | f/2.8 |
| Living room in the evening | 80 | f/0.7 | f/2 |
| Dark night | 10 | n/a | f/1 |
Most cinematographers plan on using an f-stop of at least f/2.8 for many scenarios. It forms a great balance for many things. To know more, watch this video:
What’s the takeaway? There are two:
1,000 lux (about 100 foot candles) is a great number to aim for.
It allows you to shoot at up to f/8. If you’re looking for shallow DOF at f/2.8, you can get by with about 150 lux.
Also, don’t forget that you can always choose to have a scene ‘brighter’ or ‘darker’ than average. However, you don’t learn this until you’ve done many projects.
The second takeaway is:
If you discount ‘distant night’, which is almost impossible to shoot in, the typical exposure latitude (dynamic range) of a ‘well-lit’ production is 10 stops.
Any camera that can cover more than 10 stops is good enough as long as the lighting is controlled, and is in the hands of an experienced cinematographer.
How to determine the amount of light you need
Let’s try to use whatever we’ve learned so far.
If you step back and assess your requirements, you will notice that most lighting scenarios can be bracketed into standard “spaces”.
Living rooms are typical. Office floors are typical. Bedroom sizes, showers and tubs are typical. A car is typical, a beach is typical. You get the idea.
Most low budget narrative films also have low budget locations. In other words, these are common real-world locations, not sets built just for the film. This helps in a way, because it drastically limits what you can do and how many fixtures you can use in a typical location.
As a general guideline, you could find the total quantity of light in the following way:
- Find what scenarios you’ll be shooting in. Use the table above to find the corresponding lux rating.
- You can get more accurate lux readings with a good light meter like those from Sekonic (Amazon, B&H). However, if you’re a beginner, I don’t recommend you buy a light meter. If you do buy one, here’s how to use it.
- Luckily, as of this writing, most cameras, even cheap ones, can attain about 12-13 stops of dynamic range. This means, with adequate lighting, you can make any camera sing. Good to know!
- Determine the f-number. This number is typically set for aesthetic reasons, but you could have your own reasons. Again, use the table above as a rough guide if you don’t have a light meter. If you need lower light levels, you could always use ND filters.
- Find the area of the space you’ll be shooting in.
- Study the photometric data published by lighting manufacturers. They most likely will clearly state the lux levels you can expect at certain distances. E.g., the ARRI SkyPanel X21 gives about 171 foot candles or 1,839 Lux at 9.8′ (3 m). Assuming you can have the light about 10 feet away, even with some form of diffusion, you should be able to get an f/2.8. However, always err on the side of caution! You can always find ways to cut down light, but you can’t do anything much if you fall short of the required intensity.
Let me give you a practical example
Let’s say I want to shoot a scene in a candle-lit living room. From the above table, I see I won’t need more than 100 lux to get an f/2 at ISO 800.
This means, if I point my incident light meter at the spot where the actors are going to sit, it should read about 100 lux, and I’ll have a well-exposed image. This is assuming you want f/2 at ISO 800. If your needs are different, adjust accordingly.
Let’s say, in this case, all I have is a lens with a maximum aperture of f/2.8. That means, either, I’ll have to bump up the ISO to 1600 or double the light output to 200 lux. Which choice you pick depends on the quality of the camera. If I were filming on an Arri Alexa I’d pick ISO 1600. On cheaper cameras, I’d try to increase light levels. This is a fine line, because if you raise the light levels too much, you’ll lose your candles because they would appear unnaturally dark.
Let’s say all I have is a cheap Godox SL 60 II (Amazon, B&H), which delivers 1,997 foot candles or 21,500 Lux at 3.3′ (1 m) with reflector, at 3200K.
That seems like a lot more than you need.
However, you might have to take the light back to 10 feet away so its out of the shot. You might also need to diffuse the light for a soft look that matches the candles in the scene. Now, that 21,500 lux light gives you about 400-500 lux on the face of the actor.
So, you’ll still get your 200 lux. In fact, you might have to dim down the lights in this case to get your appropriate lux level.
This is with just a 60 Watt LED light that’s relatively cheap and great value for money.
You can browse manufacturer sites for 60-100 Watt LED lights until you find one that gives you want you want. You can also buy cheap LED fixtures or bulbs and make your own fixtures.
The distance you want to place the light at is a practical one. You have to consider modifiers, and the type of light, and how it throws light, etc. It’s not as simple as buying a 60 W LED and shining it on the couch! Also, you don’t want the light fixture to be visible in your frame, or throw light back at the lens (it causes flare).
All these considerations are a part of learning lighting. Check out our online film school, where I have courses that teach film lighting for beginners.
Estimating the number and size of lighting fixtures is something gaffers and cinematographers do on every project. It is the first step towards any lighting kit, large or small. Whatever the direction you take, knowing light intensity needs and how it relates to your exposure is a critical step.
Now that we know the light levels you are bound to encounter, and your exposure settings, it’s time to learn more about the different types of lighting fixtures available.
Types of Lights for Film
First, I highly recommend you watch my video:
Here’s a quick summary:
Tungsten and Tungsten-Halogen
The oldest technology (short of a candle, that is).
Negatives: It gets very hot and isn’t very efficient. It emits yellowish light (which is similar to halogen and sodium vapor lamps). When you dim them the color temperature gets warmer. If you want to match white light (sun, office fixtures, etc.) you need to add a CTB gel and it reduces your output even more.
Positives: On the flip side the bulbs are cheap, it is relatively maintenance-free, and can be dimmed. The greatest benefit of tungsten-halogen is, barring the sun, nothing beats it for color quality. This is why many cinematographers still use it to this day. If you have the power source available, then tungsten should definitely still be considered.
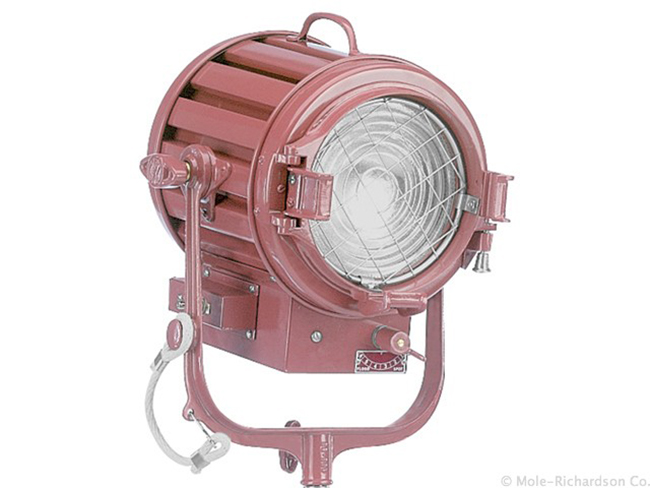
HMI
You don’t earn points for knowing what HMI stands for.
Positives: HMI is daylight-balanced and is excellent enough to match the intensity of sunlight, provided you can afford everything else that comes with the territory: ballasts, extra human beings, and lots of power. Nothing comes close to HMIs for raw light intensity vs price and speed.
Negatives: You can only dim down an HMI to about 50%, and there’s no fine tuning. Bulbs are expensive and they blow out when you least expect it. The color quality isn’t as good as LEDs, and poor bulbs can cause ugly green color casts. Also, once you switch on the HMI, it takes a few minutes to get up to correct color temperature and output before you can use it.
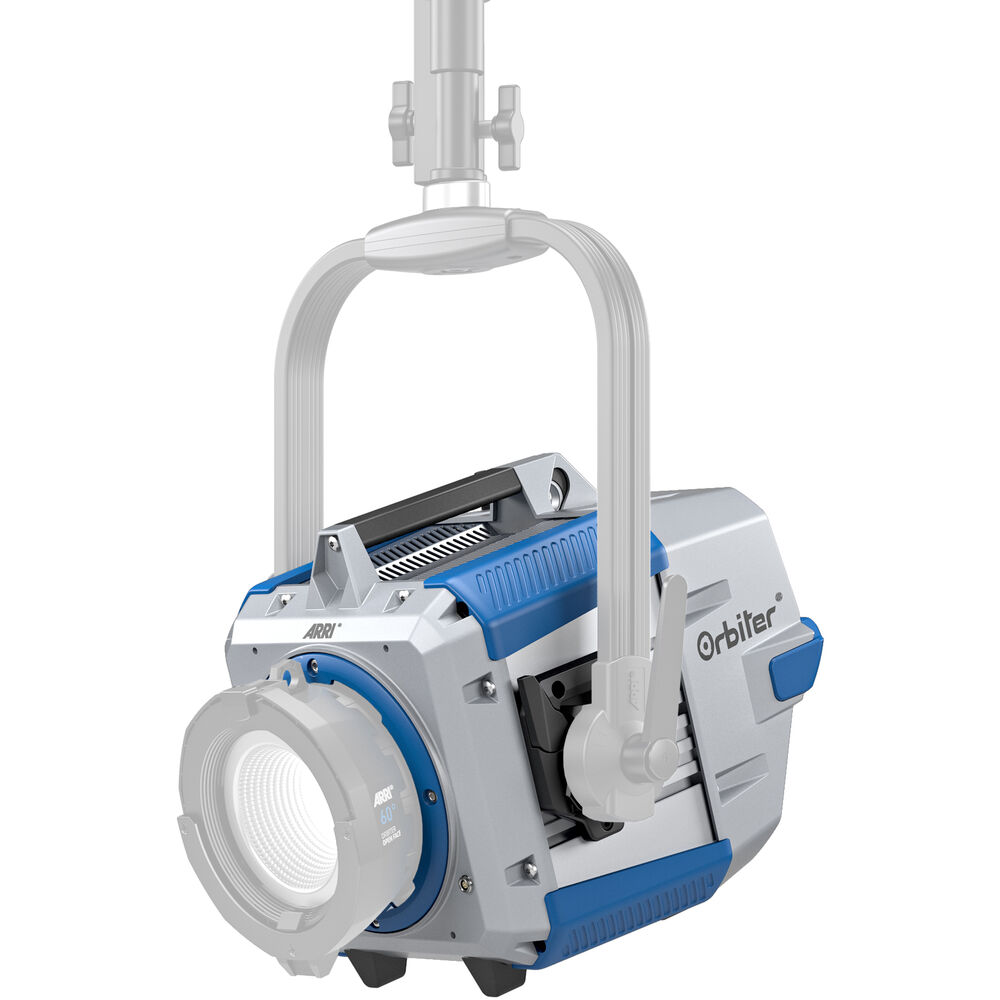
LED
LED lights are the de facto standard of lighting fixtures and instruments in cinema today.
Positives: Cheap, fully Dimmable, Bi-color or RGB, many lighting effects available, can be formed in a myriad of shapes and sizes. Low power draw and they run cool in the front.
Negatives: The color reproduction isn’t as good as tungsten, but to be honest the good LED lights are so good most people can’t tell anymore. They are, as of this writing, still too big and heavy for larger wattages, and require cooling fans to keep them alive. Cheaper LEDs also have flicker issues and strange color casts and artifacts.
Bottom line, you’d be stupid not to consider LEDs as the bedrock of your lighting kit in this day and age. And they’re getting better every year.
Fluorescent
The filmmaking world is moving away from fluorescent lights, so I will not recommend it unless you have no other choice.
Fluorescent lights were as ubiquitous as tungsten bulbs, and is usually daylight balanced but with a green-ish bias (not on the high-end models though). If electronic ballasts aren’t used, they also create flicker problems.
Unfortunately, most cheap fluorescent kits can’t be dimmed or shaped much, and their intensity and versatility isn’t anywhere near LEDs.
Plasma
Plasma was “the new kid on the block” before LEDs became popular. The technology hasn’t developed much, and the company that championed it has moved on to LED lights. Forget it.
Here’s a chart that compares these light types, along with what they bring to the table:
| Lighting Type | Typical Lumens per Watt | Color Temperature | RGB | Fully Dimmable? |
|---|---|---|---|---|
| Tungsten-Halogen | 10-25 | 3200K (reduces when dimmed) | No | Yes |
| HMI | ~85 | 5600K | No | No, only 50% |
| LED | 70-100 | 1500K to 10,000K | Yes | Yes |
| Fluorescent | 50 | 5600K, 3200K | No | Sometimes |
Things to remember:
- Nothing beats LEDs for price vs performance.
- HMIs aren’t dimmable (some go up to 50% but nothing in between). Nothing comes close to the raw power that these are capable of.
- The only major advantage of tungsten-halogen at this point is the color accuracy.
You can generalize it down even further in this way:
HMIs for day exterior work, large studios and/or when you need lots of power.
For everything else, LED lights.
Now that we’ve narrowed down our choices, it’s time to tackle modifiers. Light modifiers change the shape or quality of the light. Without modifiers, it will be very difficult to achieve the vast majority of lighting effects you see on a typical narrative film.
Light Modifiers and How they can help you get the Most out of your Lighting Fixtures
This is a complex and vast subject, and it takes years (if not decades) to learn about. It’s not enough knowing what modifiers exist out there, but also how you can make use of them, or take advantage of them in a way that improves your work.
However, we can take baby steps. Let’s start from the most basic.
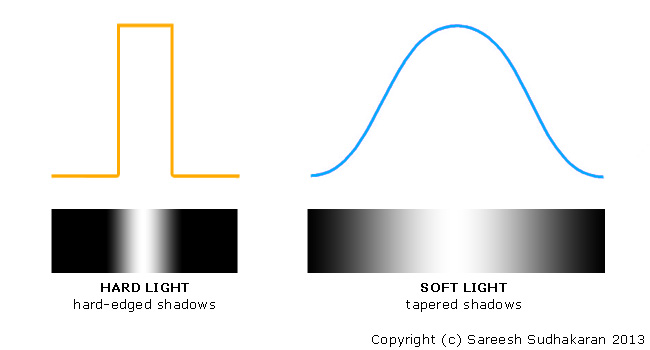
Hard light vs Soft Light
Hard light produces hard-edged shadows, while soft light produces tapered shadows that gradually move from light to dark. Take a look at this:
The fun part is learning to use hard light, soft light and all its variations, permutations and combinations.
To know more about hard lights, soft lights and diffusion, watch this video:
Why is this important? Your choice of hard and soft lighting choices will dictate the kind of modification or light source you need.
How do you get soft lighting?
The size of the light surface relative to the size of the subject, and the distance between the two dictates whether a light is hard or soft.
Here’s a table that might help you understand the relation:
| Subject Size | Size of the Light | Distance | Result |
|---|---|---|---|
| A face (one foot) | One inch | One foot | Hard |
| One inch | Four feet | Hard | |
| Four feet | One foot | Softest | |
| Four feet | Four feet | Soft | |
| Full length person (six feet) | One foot | One foot | Hard |
| One foot | Six feet | Hard | |
| Six feet | One foot | Softest | |
| Six feet | Six feet | Soft |
If the table is too confusing, use this simplified image:

As a rule of thumb, to get soft light, follow this:
Pick a light surface that’s larger than the subject and at a distance no greater than the size of the light surface
E.g, if you want soft lighting on a face, start with a light surface larger than one foot. Let’s say you pick a two-foot source (either square, diameter, or the longest length). This light should be no more than two feet away from the face.
The softer you want the light, the larger the source surface should be, and the closer the light should be. With experience, all this will be second nature.
Both hard and soft lighting is important for any narrative work. You need both kinds for a fully functional lighting kit, period.
How do you increase the size of the light surface?
There are three ways:
- You add diffusion in front of the light to increase the light area.
- You bounce the light on to a surface to increase the light area.
- You use a lighting fixture that already has a large area, like the Arri Skypanel S360-C.
Let’s look at the first two options.
Bounce vs Diffused Lighting
Start noticing the artificial light all around you.
Interior lighting is designed for diffused light. We no longer use bare bulbs in our homes or offices (or do we?). You’ll typically see fluorescent or LED banks in offices and public areas.
Exterior night lighting is still composed of small sources at a distance. Street lights are a good example. Car headlights are another. Candles and torches are yet another example of hard light sources. You rarely have soft lighting sources (unless you count a busy street with shops or malls all around you, and you’re enveloped in light).
On a cloudless day, the sun is always a hard source. It’s softer in during golden hour, but it’s still classified as a hard light. On a cloudy day you have soft, even light.
Being observant is a start.
What you really should be looking for, is light that’s not just directly hitting the subject, but also either bounced off other surfaces, or diffused by something.
Both bouncing and diffusing is done to increase the surface area of the light. E.g., if your LED COB light emitter is a few inches across, it’s basically a hard light. By adding a 4×4 diffusion frame (or softbox) in front of it, you are effectively increasing the light surface area to 4×4.
It’s the same light, but now the area is bigger. This makes it softer at the same distance.
A similar effect can be achieved by bouncing the light on to a 4×4 frame, and that is then reflected back to your subject.
Why would you want to bounce light? Here’s a good practical reason:

In image A, due to the proximity of the wall, you might not have enough space to put a diffusion frame or softbox between the light and your subject. There might be other limitations. E.g., the light source might be visible in your frame.
When we place lights in a scene, there’s always a certain amount of ‘tweaking’ involved. This tweaking is done in a physical space – you move lights around, you rotate them, you change the angles or heights, etc. You need space.
In image B, we can bounce (reflect) the light off a surface. This ‘imaginary wall’ could be an actual bare wall, or a wall covered in diffusion material, or a foam board, or a reflector, etc. More on these later.
As a general rule of thumb, when you have more space, you can diffuse light and move it around. When you don’t have space, it is more practical to bounce light.
There is no such thing as ‘one is better than the other’. A good cinematographer must know how to use both, and a good lighting kit will have allowances for both.
A beginner isn’t expected to have the experience to know how to tackle all scenarios. Usually, you learn as you go, and handle problems on a case-by-case basis.
When putting together a versatile lighting kit you want to have sufficient resources at hand to at least give you a shot at tackling these problems.
Whether you bounce or diffuse, remember that this diffusion or bounce area becomes the new light surface area.
Let’s look at a few diffusion systems.
Methods of diffusing light
I’m not going into the details here, but for quick reference, here are the most popular diffusion systems:
- Diffused light sources (e.g., fluorescent lights, large LED panels, tubes etc.)
- Light banks (many light bulbs or fixtures put next to each other – therefore a ‘bank’. A Batten light is an example of a simple light bank.
- Fresnel lens – a lens and bulb arrangement that allows you to spot (focus the light beam) or flood (spread the light beam) for aesthetic effect.
- Softbox
- Reflectors – silver reflectors, white reflectors like foam board/polystyrene boards, or even mirrors.
- Bounce materials – the two most popular in the film word are Ultrabounce and muslin.
- Paper lanterns.
- Umbrellas – not used much in films.
Whew, that’s a lot!
Nah, we’re just getting started.
Light Modifiers
Modifiers are really a broad name. Too broad perhaps. Here are some ways to modify light:
- Block light from hitting a space you don’t want lit. This is called flagging or cutting, or negative fill.
- Diffusing it or changing its shape or quality
- Changing the color temperature of the light
- Redirecting it
- Adding patterns to the light
Here are some popular light modifiers:
- Barn doors – These are flaps placed on the light source to block it from hitting places you don’t want shone.
- Honeycomb grids or Egg crates – These are patterns placed in front of the source to direct the light without spill. They are very handy in a tight spot.
- Nets – These are nets that reduce the output of the light.
- Filters or Shapers – There are an infinite number of doohickeys available to diffuse, shape or redirect light. Snoots are one good example, cut-outs are another.
- Gels change the color temperature to match existing sources of daylight. The most common are CTO (Color Temperature Orange – changes 5600K to 3200K), CTB (Color Temperature Blue – changes 3200K to 5600K) and Minus Green (Removes green casts). All of these gels come in various ‘strengths’ so you can precisely balance the color temperature.
- Flags and cutters – these are black boards (or frames of black cloth) of various sizes and shapes that are placed in different areas to cut light selectively.
- Negative fill – these are completely opaque black cloth (typically Duvetyne) to stop light from bouncing around so much.
- Optical lenses or Ellipsoidal lights – to focus the light even more.
- Patterns or Gobos – different shapes and patterns that can be projected on to a scene using optics.
If you are a beginner, you might be overwhelmed with the types and amount of modifiers available. Even if someone were to hand all of the modifiers to you on a silver platter, you probably wouldn’t know what to do with them all. That’s okay, it’s part of the learning process.
Light Stands, Grip and Cases
The last part of the puzzle are light stands and grip. Read this to learn more about stands and grip:
All the things that go into shaping and modifying light is called Grip equipment. Stands, too, fall under grip equipment. From now on, I’m going to refer to them as lighting and grip.
Here are a few important grip items:
- Grip arm and grip head – These are essential additions to your light stands to help you flag your light correctly, or use modifiers in the best possible way.
- Cardellini clamp – I find Cardellini clamps to be entirely essential. There are many types, but you need at least one to attach lights to ceilings or walls or furniture. Go for the end jaw type.
- Super or Mafer clamp – These are useful to hang things off light stands, or just hang fixtures or flags off furniture.
- Sand bags or shot bags – Critical items to safely use light stands or menace arms
- Apple boxes – These are wooden boxes that come in different sizes (but standardized) and I can’t begin to tell you how important they are.
- A-clamps
- Various metal clips, C47 clips, etc.
- Some kind of distro (electrical distribution box) to route your cables and get power. Add high quality cables, too.
- Gaffers Tape
Finally, you have to factor in cases and bags for you lighting and grip equipment. Hard cases take up weight and space, too.
Then, you have to factor in different boxes or carts to organize your grip equipment, and a way to transport everything securely and safely.
Wow. Do you really need to know all this stuff?
Actually, you do. But the good news is, you don’t have to know all of it right now.
Your crew
Maybe you’ll have the budget for additional crew members, maybe you won’t. But you need to know what your options are.
Here are the key positions on a film in charge of lighting and grip:
| Position | Role |
|---|---|
| Gaffer or Chief Lighting Technician | The individual responsible for executing the cinematographer’s vision. |
| Best Boy (Lighting) | The ‘foreman’ of the team. In charge of organizing and managing the lighting team. Reports to the Gaffer. |
| Lighting technicians or electricians or light men | The individuals who carry lights and fixtures, and manipulate them according to the cinematographer’s or gaffer’s wishes. Reports to the Best Boy. |
| Key Grip | The individual responsible for executing the cinematographer’s vision. |
| Best Boy (Grip) | The ‘foreman’ of the team. In charge of organizing and managing the grip team. Reports to the Key Grip. |
| Grips | The individuals who carry stands and modifiers, and manipulate them according to the cinematographer’s or gaffer’s wishes. Reports to the Best Boy. |
Depending on the country, the positions and responsibilities might change. E.g., in the US, lighting and grip are handled by two separate teams. In India, where I live, they are basically one team.
That’s it for gear and crew. The last step in our road to our lighting kit are “restrictions”.
Estimating the Physical and Electrical Restrictions of Low Budget Narrative Films
No matter who you are, you’re always tackling restrictions. Knowing your boundaries beforehand helps you isolate only those items that work for you.
Restrictions are dictated by factors beyond light. Some of the common roadblocks to a low budget film are:
- Money/Budget
- Crew size and experience
- Locations
- Speed of Production, the schedule
- Weight and Traveling Limitations
The two important ones are crew size and experience, and weight limitations.

Know your limitations and the limitations of your crew
Here are some real-world physical restrictions that you should consider:
- How much can you carry? Let’s say you can fit everything in a car. How many trips would you have to make to get all that gear to your location? At the end of the shoot, after you’re tired, how many trips are you willing to make to get all that gear back into the car?
- How much time will it take you to pack and unpack all your gear from its boxes?
- How many people can you afford to have in your team? How many lighting technicians? How many grip?
- Do the individuals you have in your team know how to handle everything professionally?
If you are one-person cinematographer who aspires to move around a bit in his or her own car, there are physical restrictions on how much you can carry, set up and use.
E.g., if you don’t have a team to help you, don’t have too many lighting fixtures and grip items in your kit. There won’t be enough time or money to even use them.
I don’t recommend any kit weighing more than 30 kg (65 lbs) total. You can always split your cases, in which case I recommend a total weight of not more than 50 kg (110 lbs).
Next restriction. Let’s talk electric power.
Electrical Restrictions
Here are the typical electrical specifications available:
- Single-phase 120V 60 Hz
- Single-phase 220V 50 Hz
- Three-phase systems
Unless you are shooting in industrial areas, it is unlikely you’ll have access to a three-phase supply. For low-budget narrative work, just assume normal electricity.
The Ampere rating required depends on the voltage (larger the voltage, lower the amperes for the same power source), and typically, you’ll see ratings from 2A to 50A or so. An electrical circuit is designed for all of these specifications. E.g., the socket will be rated in Amperes, say 20A, for a certain voltage.
The cables that run from this socket to the breaker must also be rated for the same current. Finally, the breaker and distribution board must be rated for the same.
Let’s say you have a 15A socket over a perfectly designed circuit. In theory, this circuit can drive a device with a power rating of 1.5 KW (at 120V) or 3 KW (at 230V). Don’t make the stupid mistake of using formulas meant for DC for AC. Also, most people forget to factor in voltage drops, power factors, loops, inrush currents, distances, and many other factors – not to mention poor wiring in homes or offices, and voltage drops in the grid.
If you have access to more than one socket, you need to first determine if they are within the same ‘loop’ or ‘circuit’, fed by one breaker. You’ll find the breakers in the Distribution Box (DB). If you have different circuits, you can draw 1 KW off each socket. Luckily, larger spaces will have more high-ampered sockets/circuits, so the situation is ‘just about manageable’.
Please get a certified electrician to inspect the cables, voltage levels, etc., to ensure the wiring can sustain the lighting load. Also find a backup plan for blown fuses or breakers.
I’m not getting into generators here because that, too, like all things electrical, demands a different kind of expertise that takes years to understand and master. Generators are typically a rental item, and they do consume fuel. This equals more costs.
If you found the last few paragraphs tough reading, then you’d be better off hiring a gaffer or working with just low-power LED fixtures that you can power off a household wall socket. In fact, that’s exactly what I’m about to recommend, because electricity is one of the most underestimated issues in lighting.

“Whatever is left must be the truth.”
So, where does all this lead us? Let’s distill all this into a nutshell:
- Think about the maximum light output you need for the film.
- Think about the range of light intensities you need for the film.
- Think about the weight of your lighting kit.
- Think about the number of items in your lighting kit.
- Think about how much power you’re going to have on location, or whether you can afford a generator.
- Think about how many crew members you can afford to pay for lighting and grip.
- Think about travel, by car or airline.
These factors practically force you into certain decisions that will dictate your lighting kit.
Let’s get to it.
How to put together a Lighting Kit for Low Budget Narrative Films
You can broadly classify low budget narrative films into these five classifications:
- Run-and-Gun Exteriors (lightweight, fast shooting, naturalistic lighting)
- Classic – Typically Lit Interior Scenes
- Controlled or Lit Day or Night Exteriors
- Night City Lighting
- Green Screen or Blue Screen Work
There’s a trap you shouldn’t fall into. If you find some people shooting in any of these situations with bare-minimum equipment, or no lights at all, don’t assume it will work for your situation.
Sometimes, certain angles work best for that person’s project, but won’t work for yours. The no-lighting situation might work for one angle, but for a different angle, it won’t.
Some situations need controlled lighting and grip. There are no two ways about it. To know when you need it and when you can manage with little, it takes years of experience. One way to handle this lack of experience is to hire a good Gaffer and Key Grip. Their expertise and wisdom are priceless.
Let’s continue.
For classifications 3 and 4, you need professional help. You need to rent lights or you need to replace or augment street lamps to get a professional look. There’s no way around it unless you’re only shooting close ups.
If you just have a few close ups then you might be able to make it work. Let me repeat. If you have to film in setups that fall under 3 or 4, opt for close ups.
For number 5, you need a cleanly lit green or blue background. What you choose here depends on what options you have in post production. If you can afford a roto artist and a talented compositor, then you can go cheap. Otherwise your chroma key work will look amateurish.
The smaller the chroma key, the easier it might be. You have to have enough lights in your kit to satisfy simple green screen work.
Which leaves us with options 1 and 2, where 99% of the low budget filmmaking game is played. You can do wonders here, if you know what you’re doing.
Let’s get to the final part of this article, the actual lighting kit.

Lighting Kit Suggestions for Low Budget Narrative Filmmaking
I’m going to give you two kits:
- The “1-ton combo truck” kit, and
- The “Single-person with one or two assistants” kit
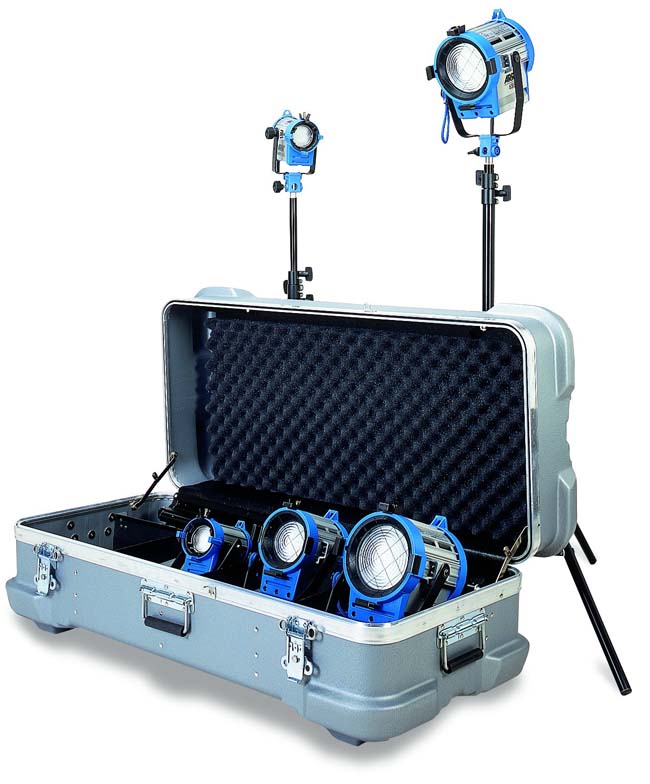
The 1-ton Combo Truck Lighting and Grip Kit for low budget narrative films
This list is not exhaustive, and I might have missed out some equipment. This kit is for those who want to rent or buy a low-budget lighting kit for narrative work.
First, the lights:
| Fixture | Quantity | Notes |
|---|---|---|
| Arri M18 or Nanlux Evoke 2400B | 1 | These are the biggest lights you can plug into a wall socket. Great for simulating sunlight through small windows, or for keying larger spaces on a budget. |
| Arri Skypanel S60-Cs or similar RGB LED Panel between 300-500 Watts | 2 | These are the bread and butter interior lights. The versatility is unmatched. |
| 600 Watt LED Open faced lights, Bi-color or RGB. | 2 | These are lights you bounce or use as diffusion when you need it and when panels won’t help. Make sure they dim down to zero, and are bi-color. |
| ETC Source 4 LED or Aputure 60x or similar, with an Ellipsoidal optical attachment | 2 | Get at least one if you can. Ideally bicolor. |
| Aputure MC or DMG Lumiere DASH kit | 4 | These are extremely versatile and useful in a pinch. Get the four-light kit if you can, or at least a couple. |
| Regular LED bulbs, both 3200K and 5600K, of different varieties | 4-10 | Get clear bulbs and frosted bulbs of different wattages. This will help you replace practical bulbs as well as for Paper Lanterns. |
Now let’s talk about modifiers and grip.
| Item | Quantity | Notes |
|---|---|---|
| 4×4 Frames | 2 | Get diffusion material like 216, 250 or Grid cloth, etc. You can also use DIY material like muslin, shower curtains, etc. |
| 8×8 Frame | 1 | Same, but for wider shots or exteriors. To be honest you really need 12×12 or even a 20×20, but it’s hard to recommend on a low budget. |
| Honeycomb grids | 2 | These are for the panels. |
| 4×4 Floppies | 1-2 | They block the light |
| Flag and Cutter kit | 2x 2×3, 2x 1.5×2 | If you can, get a full kit. |
| Duvetyne | 10 meter roll | Get clips, a scissor and Gaffers tape to tape these sheets to walls, etc. |
| Paper Lanterns | 3-5 | Don’t forget to get bulb holders and long cables, and wire to hang everything. |
| Bleached Muslin or white bedsheets | 10 meter roll | You will find this handy to bounce light. |
| Ultrabounce | 8×8 | To use with the 8×8 frame, or folded down with the 4×4 frame |
| Foamboard or Polystyrene boards, 4×4 | 2 | Very useful. Tape them along the edges to they don’t disintegrate easily. |
| C-stands with Grip arm and heads | 6 | |
| Combo stands | 2 | |
| Short C-stand | 1 | |
| Apple Box Set | 1 | Full Apple, 1/2, 1/4, and Pancake |
| Cardellini Clamp with 6″ End Jaw | 2 | |
| Mafer Clamp | 1 | |
| Assorted A-clamps, Grip clips, C47s | As many as you can get. | |
| Cords or rope, bungee cables, straps | Get whatever you can get your hands on to secure your gear. They’re all handy. | |
| Distro board | 2 | Make sure your lights can work and can be distributed using this board |
| Honda Generator | 1 | A 7.5 KW generator should be good enough for this kit. You’re not going to be using all your lights at the same time. If you are, then you need house power. |
| 20 lbs Sand bags | 6-10 | Loaded with sand |
| Tool box | You need a full toolbox | |
| Safety gear | Gloves, helmets | |
| Gaffers and Duct Tape | As many rolls as you can | |
| Cinefoil or black Kraft/chart paper | One roll | |
| Cables for your lighting | ||
| Plastic cover for your gear | ||
| A ladder | As big as what fits in your truck | |
| A Hand truck or Industrial Trolly | To cart everything | |
| A Truck | To fit everything in. There are tons of videos online on 1-ton grip trucks or 1-ton combo trucks. |
Does our kit fulfill all the conditions outlined above?
- An M18 in Spot mode can easily get you 1,000 lux even after it’s bounced or shone through diffusion outside a window. In Flood mode with a softbox you should get about 1,000-2,000 lux at 10 feet. The bulbs matter here.
- A Skypanel 60-C at 10-feet gives you about 1,000 lux. You typically have it closer as a key, in which case you can diffuse it even further and still be able to key your subject. Similar powered LED panels should give you similar results.
- An Aputure 600D open face can deliver about 2057 foot candles or 22,150 Lux at 3.3′ (1 m) and 241 foot candles or 2,600 Lux at 9.8′ (3m). With a reflector you’ll get a lot more. That’s more than enough punch.
- The combined power draw of this kit (assuming an M18) is about 4 KW (actual power draw will vary based on many factors). All of them can be used on house power with different circuits (be careful about the 2400 Evoke in countries with 120V. I’ve heard it’s doable, you just need to power them through 20A circuits correctly).
- The lights are typically open faced, so you can use any kind of modifier – fresnels, optics, softboxes, bounce, etc. The LED panel gives you a wash of light or soft light up close quickly, with lots of versatility. You can create hard or soft light as you see fit.
- The RGB and light effect capabilities give you different modes typically used in narrative film – lightning, TV flicker, candle light, police cars, party mode, etc.
- The number of lights and grip equipment in a 1-ton truck can be operated by a crew of 2-4 individuals.
The advantage of this kit is it can help you with almost any scenario a director can throw at you. We’re not promising the moon here, but the lights are powerful enough for interiors, can be dimmed down, and can be combined for exterior firepower when you need more light.
Now, what if all this is out of the question? Can we pare it down for a solo cinematographer who can only afford one or two assistants? Let’s see what we can do.
The “Single-person with one or two assistants” kit
What we’re trying to achieve here is versatility for as little weight and number of items as possible.
First, the lights:
| Fixture | Quantity | Notes |
|---|---|---|
| Any Bi-color LED Panel between 300-500 Watts | 1 | Get the biggest one you can afford. |
| 300 Watt LED Open faced light, Bi-color or RGB. | 2 | These are lights you bounce or use as diffusion when you need it and when panels won’t help. Make sure they dim down to zero, and are bi-color. I would definitely try to get 600 Watt lights if I could. |
| Aputure 60x or similar, with an Ellipsoidal optical attachment | 1 | Ideally bicolor, but daylight will do. |
| Aputure MC | 2 | These are extremely versatile and useful in a pinch. |
| Regular LED bulbs, both 3200K and 5600K, of different varieties | 4-10 | Get clear bulbs and frosted bulbs of different wattages. This will help you replace practical bulbs as well as for Paper Lanterns. |
Now, the modifiers and grip:
| Item | Quantity | Notes |
|---|---|---|
| 4×4 Frames, collapsible | 1 | Get diffusion material like 216, 250 or Grid cloth, etc. You can also use DIY material like muslin, shower curtains, etc. |
| A 36″ Softbox | 1 | It’s fast to setup and you don’t need additional C-stands |
| Flag and Cutter kit | 2x 2×3, 2x 1.5×2 | If you can, get a full kit. |
| Duvetyne | 10 meter roll | Get clips, a scissor and Gaffers tape to tape these sheets to walls, etc. |
| Paper Lanterns | 2-3 | Don’t forget to get bulb holders and long cables, and wire to hang everything. |
| Bleached Muslin or white bedsheets | 10 meter roll | You will find this handy to bounce light. |
| Foamboard or Polystyrene boards, 4×4 | 1 | Very useful. Tape them along the edges to they don’t disintegrate easily. |
| C-stands with Grip arm and heads | 2 | |
| Short C-stand | 1 | |
| Light stands | 2 | These can hold the light and a softbox, but no heavy grip stuff. |
| Cardellini Clamp with 6″ End Jaw | 1 | |
| Mafer Clamp | 1 | |
| Assorted A-clamps, Grip clips, C47s | As many as you can get. | |
| Cords or rope, bungee cables, straps | Get whatever you can get your hands on to secure your gear. They’re all handy. | |
| Distro board | 1 | Make sure your lights can work and can be distributed using this board |
| 20 lbs Sand bags | 4-6 | Loaded with sand |
| Gaffers and Duct Tape | As many rolls as you can | |
| Black Kraft/chart paper | One roll | |
| Cables for your lighting | ||
| Plastic cover for your gear | ||
| A Hand truck or Trolly | To cart everything with as few trips as possible. |
I have worked with both kinds of kits. I’ve shot films where there was only one light, a stand, a modifier and it was just me; and I’ve shot projects where I’ve had a full lighting and grip truck, and a team of 7 electricians and grip, and a Gaffer.
The most important thing about a ‘kit’ is that it should be versatile. It should fulfill all the conditions we’re going to face in narrative filmmaking.
I know this was a long article, but lighting and grip is complicated. It takes many years to come to terms with all the options available, let alone master them. Yet, I didn’t want to leave you hanging without definitive recommendations. Feel free to change things as you see fit.
Can’t make up your mind? Use my rule of thumb:
When in doubt, rent!
I hope this article was helpful to you. Let me know what you think in the comments below.
Thanks for all the knowledge you share with us !
You’re welcome!
In your chart, how are you getting your lumens values for 100 square feet?
For example, if you’re exposing for say 1000 lux in a 1,000 square foot room, then if lumens = lux/square meter (and 1 square meter = approx. 10.76 square feet), then the lumen value for the room ought be 92,903.04 lumens, correct? Now if I do the same calculation for a 100 square foot room, it seems like I should get 9,290.304 lumen, but your chart indicates 31,623 lumen? I’m not sure how that number is occurring, would really appreciate explanation on that point. Thanks for all the info by the way!
Oh…. is it because you’re accounting that you’re trying to hit t/2.8 in your 100 sq ft calculation, and therefore need approx. 3 stops less light? I can get close, but I still don’t know how you got those exact numbers though…
Check out the articles in detail on photometry. Lumens is what the light outputs, there’s no such thing as “92,903.04 lumens for the room”.
You are such a valuable cinematographer master !
Thanks for all the knowledge you share with us !
Its gold mine !
Nicolas from Netherland
You’re welcome!